Migration Plans
Migration Plans are created and managed from . Plans orchestrate the migration of one or more VMs from VMware vCenter to an HVM Cluster.
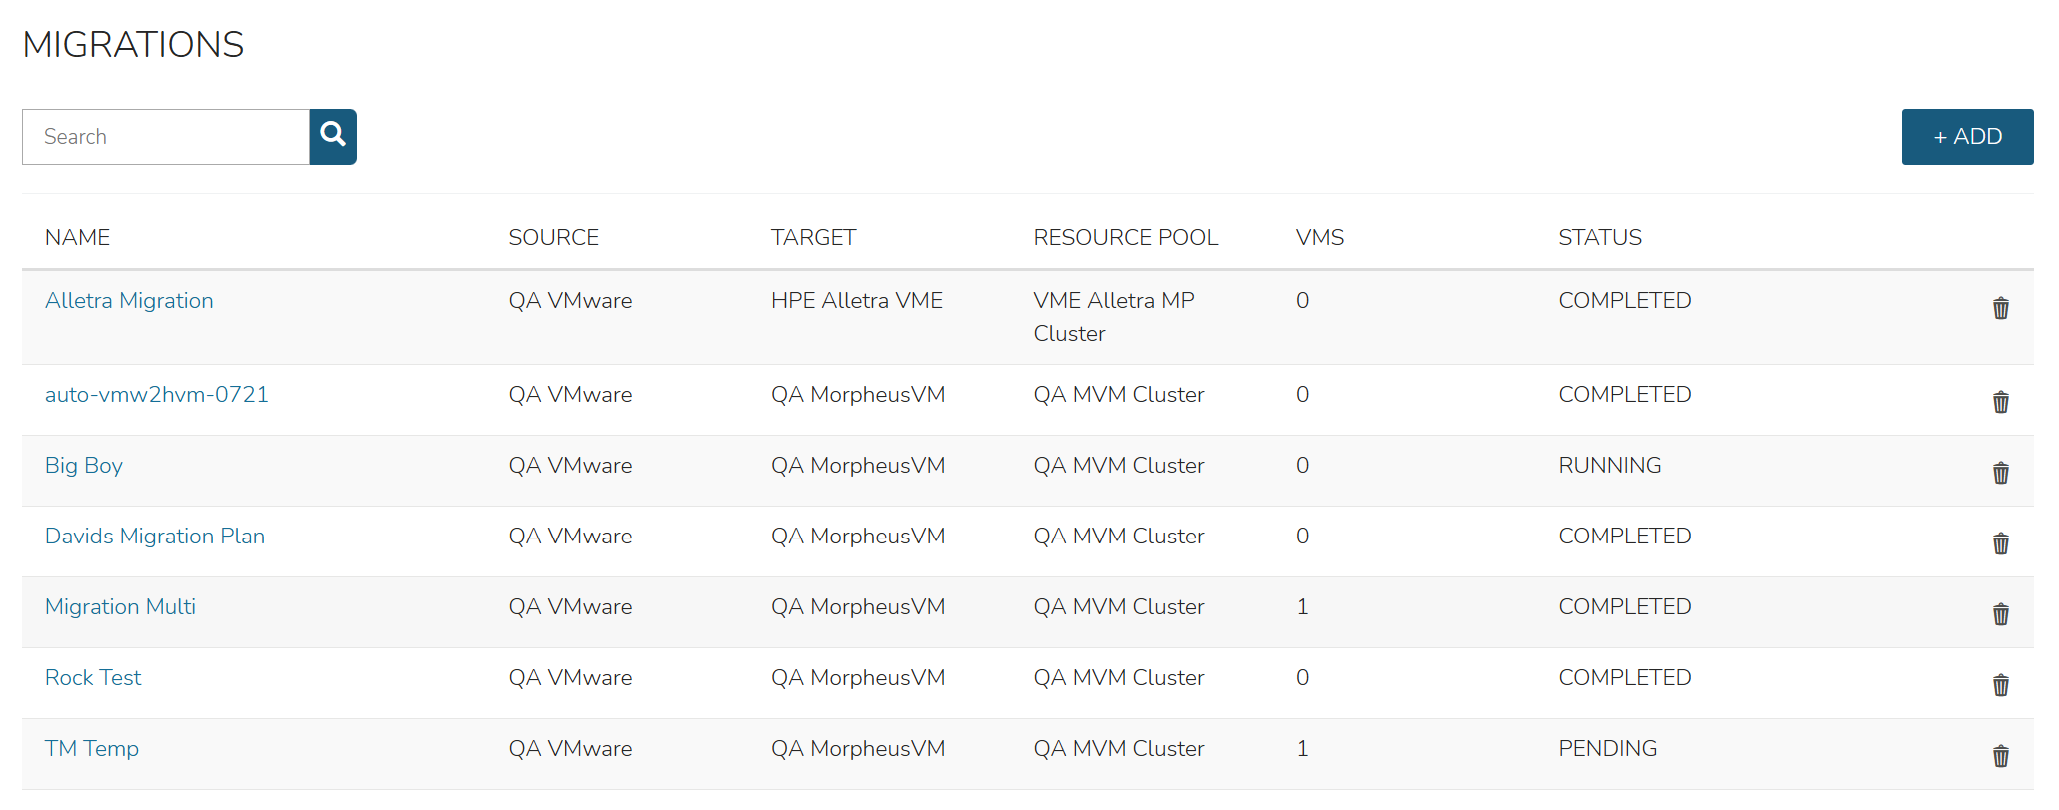
Plans are created in a Pending state and require an explicit action to begin execution. This allows plans to be prepared in advance and run during scheduled maintenance windows. Completed plans remain on the list page for review and may be deleted when no longer needed.
Creating a Migration Plan
From the Migrations list page (), click + ADD to start a new plan.
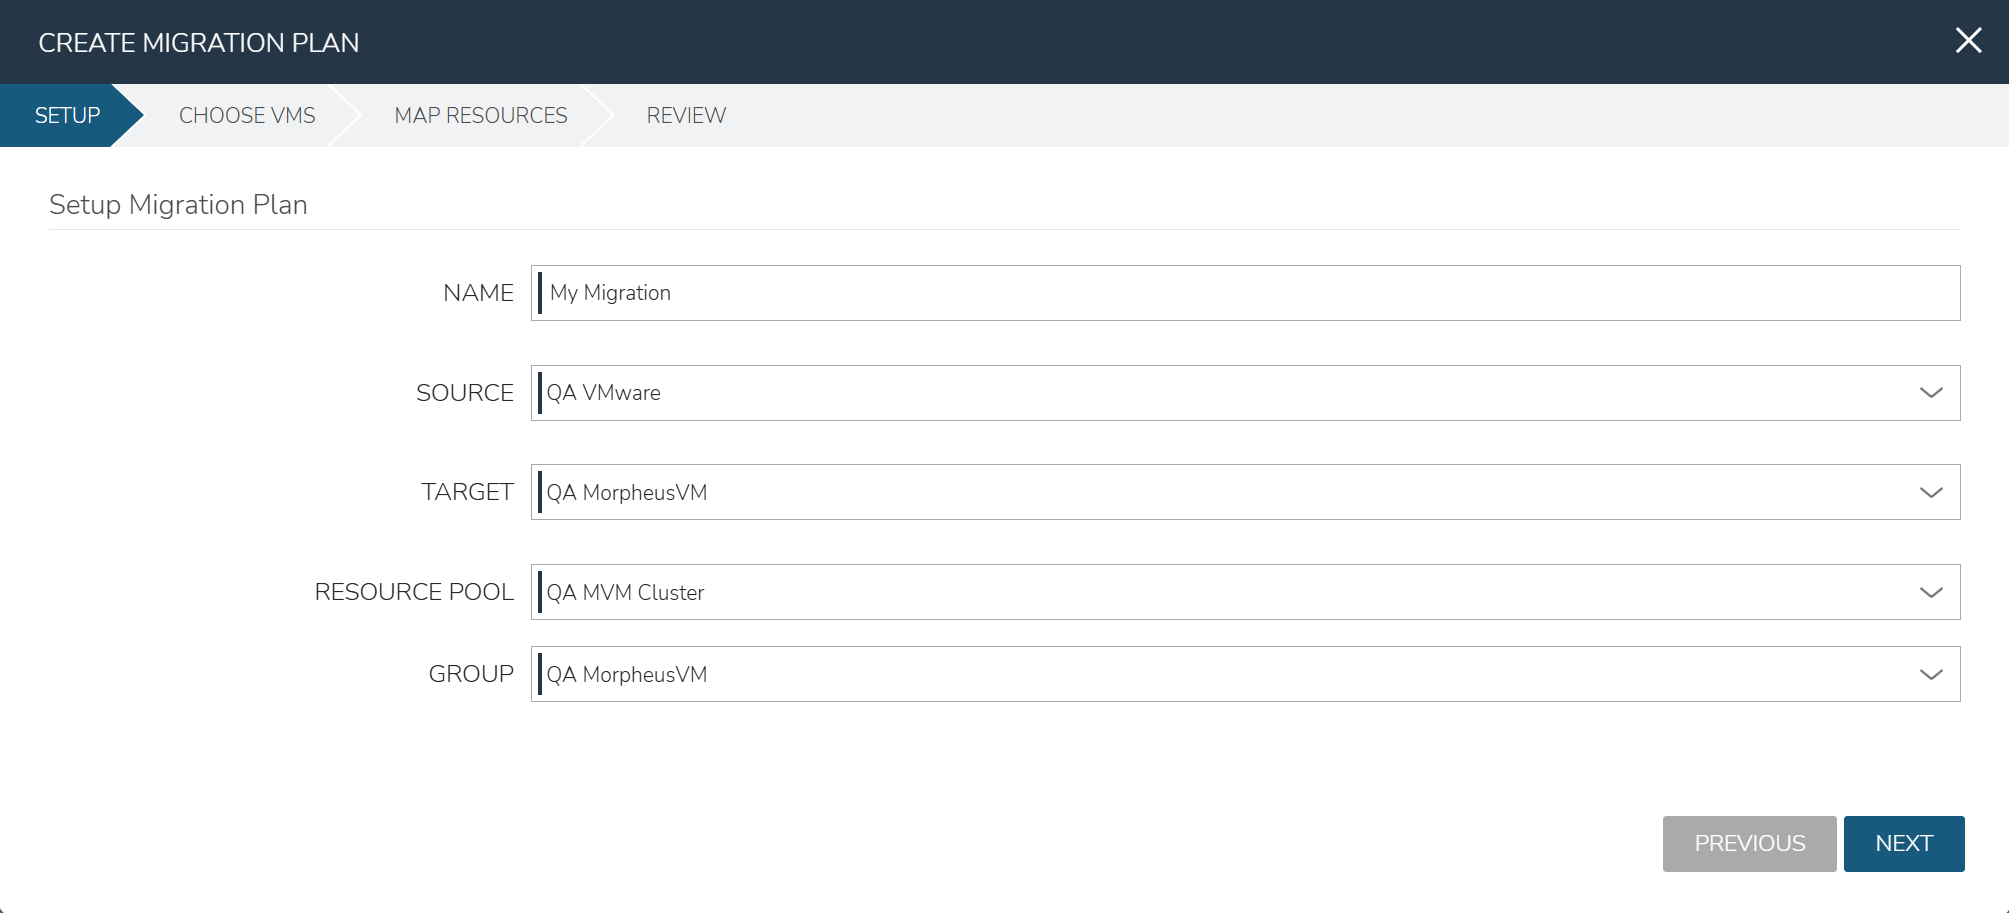
Step 1: Setup
Configure the basic plan parameters:
NAME — A descriptive name for the migration (e.g., “Production Web Servers - Wave 1”)
SOURCE — The source VMware vCenter Cloud integration
TARGET — The destination Cloud containing the HVM Cluster
RESOURCE POOL — The HVM Cluster to receive the migrated VMs
GROUP — The Group which will own the migrated VMs
Click NEXT when finished.
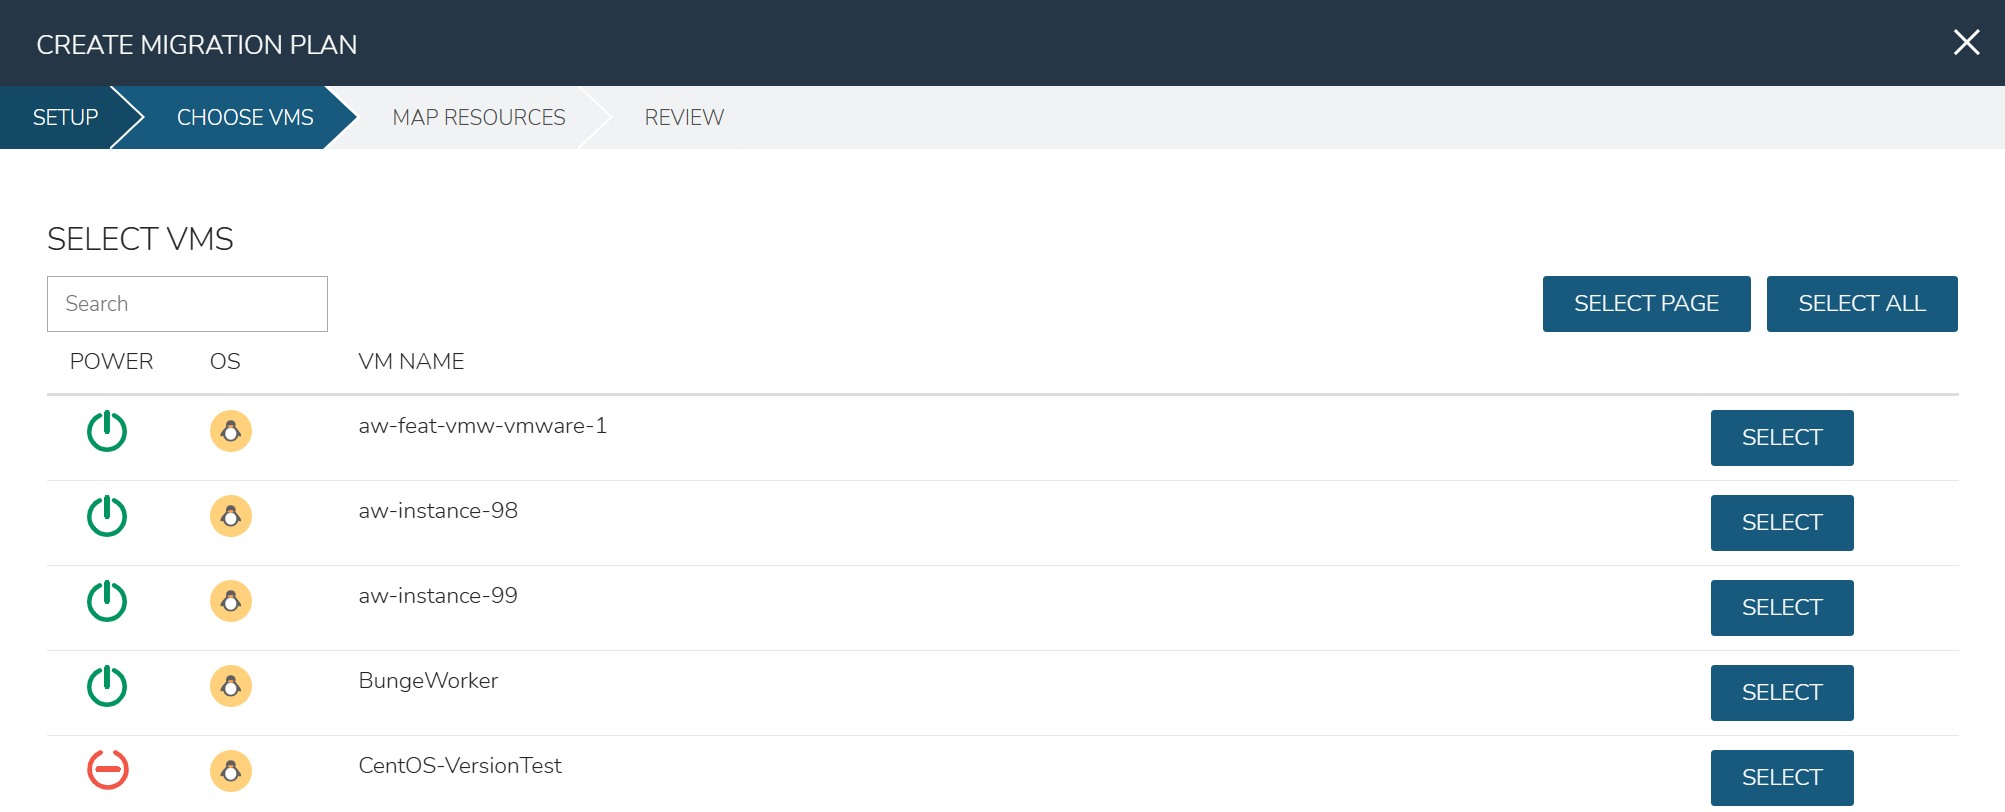
Step 2: Select VMs
Choose VMs from the source VMware Cloud to include in this migration plan. Selected VMs appear in a list at the bottom of the modal. You may select as many VMs as needed — all selected VMs will be migrated in parallel when the plan is executed.
Click NEXT when finished.
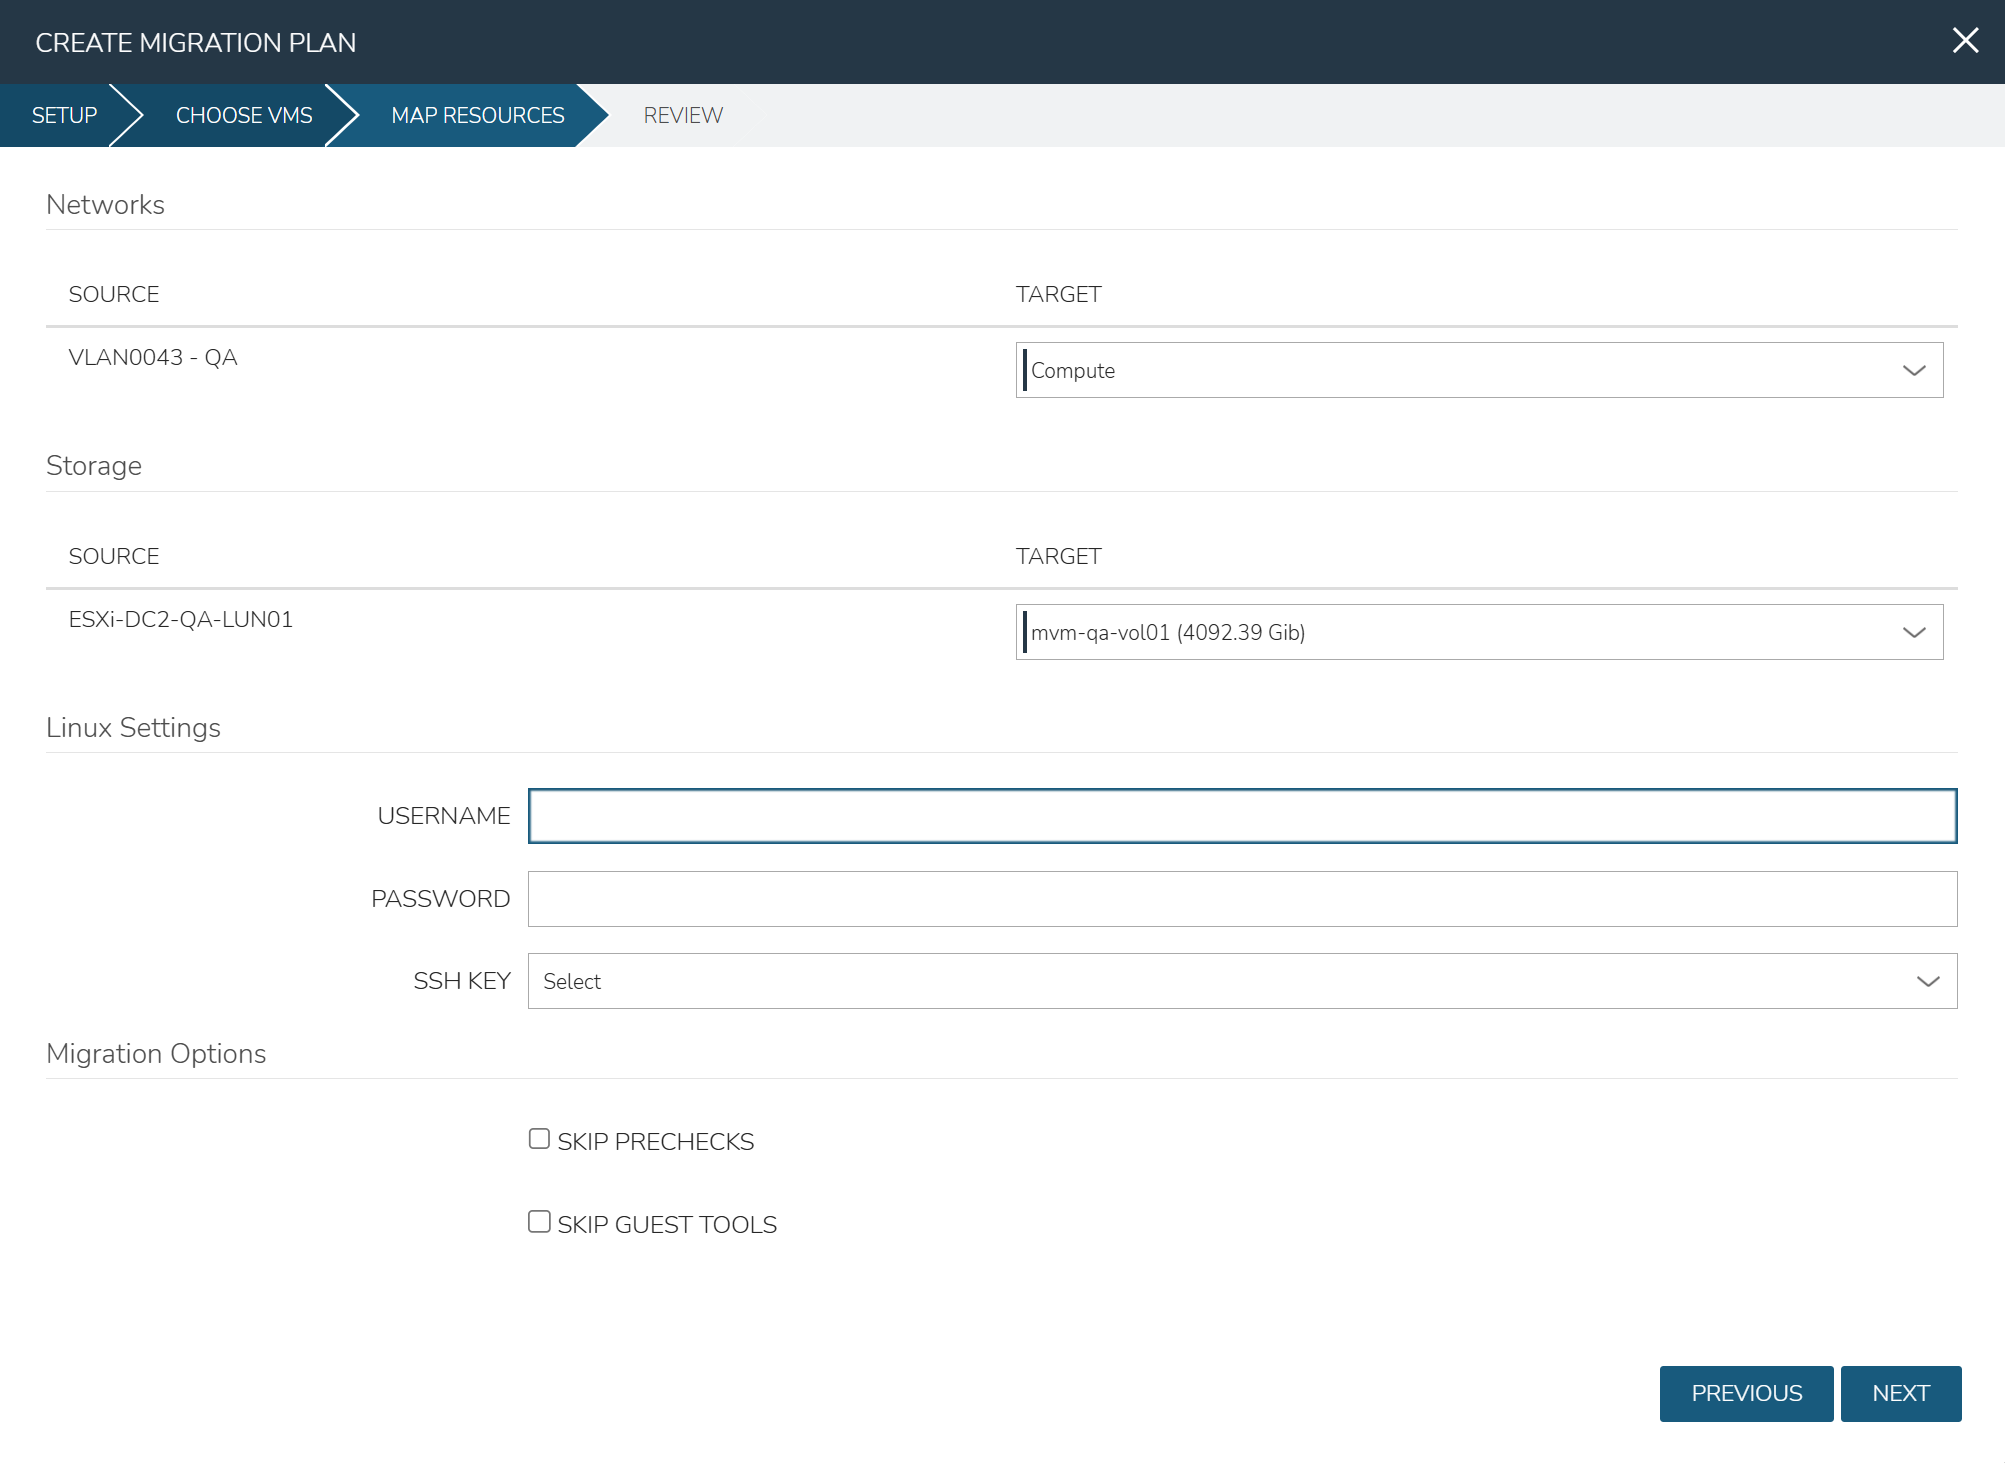
Step 3: Resource Mapping
Map source resources to destination resources:
Networks — For each source network detected on the selected VMs, choose the corresponding destination network on the HVM Cluster
Datastores — For each source datastore, choose the destination storage location
Credentials — Optionally provide existing Linux or Windows credentials for guest access during preparation
Skip Prechecks — Toggle to skip the precheck phase (not recommended for first-time migrations)
Skip Guest Tools — Toggle to skip guest tools installation (only if tools are already installed)
Click NEXT when finished.
Step 4: Review
Review all selections. Return to any previous tab to make adjustments. Click COMPLETE to save the plan.
Running a Migration Plan
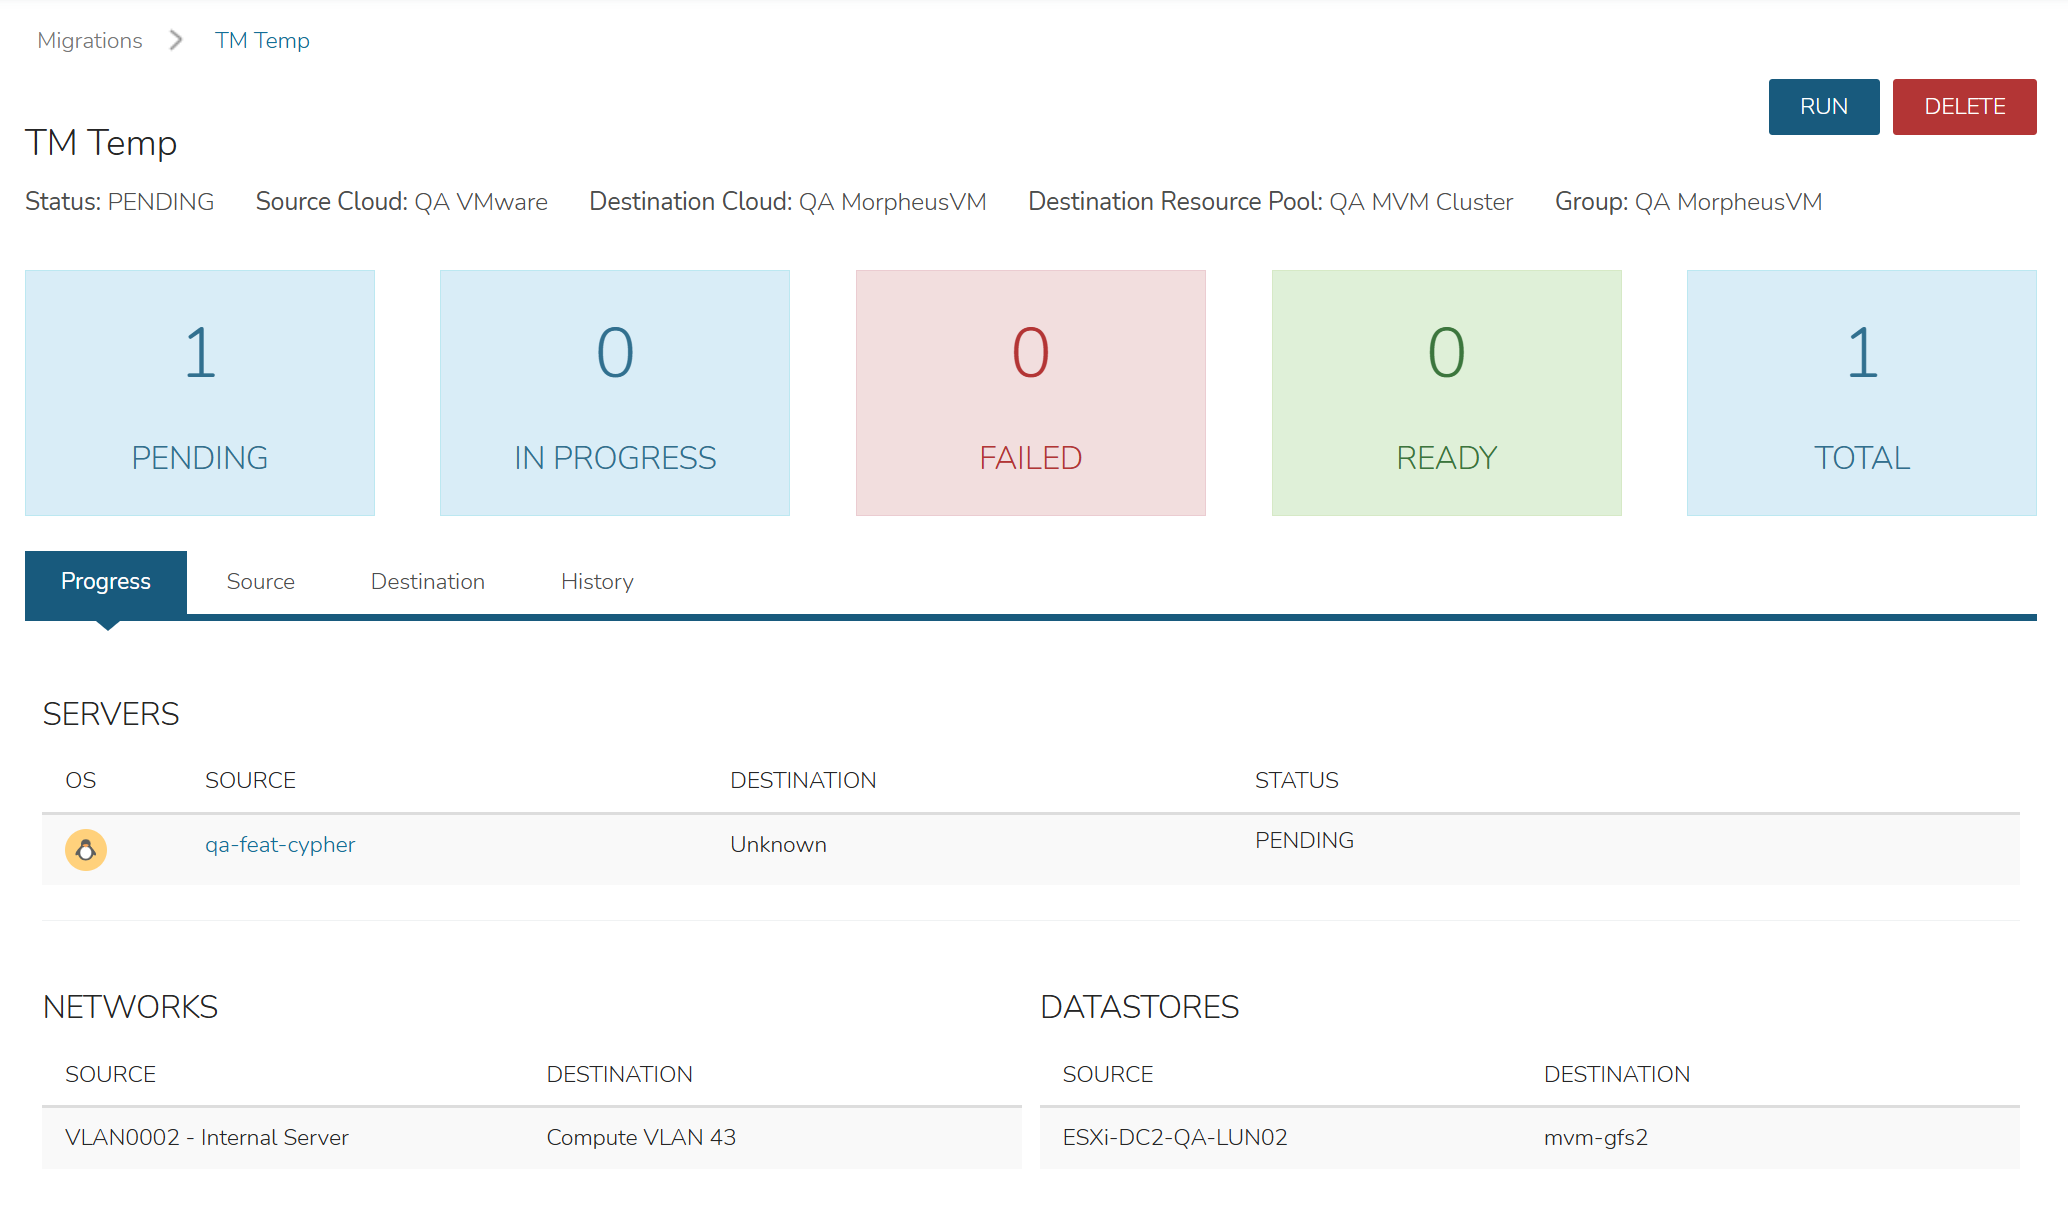
After creation, the plan is in Pending state on the Migrations list page. All configuration details are displayed on the plan detail page.
To execute the migration, click RUN.
Important
Running a migration will power down source VMs during the transfer phase. Plan accordingly for service disruption on source workloads.
Monitoring Progress
Once running, the plan detail page provides real-time status:
Summary view — Shows overall plan status and per-VM progress through migration phases (Precheck → Prepare → Create → Transfer → Reconfigure → Finalize)
History tab — Detailed log of all actions taken during the migration
Destination tab — Details on VMs that have been successfully migrated to the HVM Cluster
Transfer times depend on disk sizes, network bandwidth between HVM hosts and ESXi, and target storage I/O performance. The system allows up to 48 hours for individual VM transfers to complete.
Tip
During the Transfer phase, you can monitor the OVF Export task in vCenter for real-time progress on the actual disk transfer and conversion. This reflects the true data movement from ESXi to the target HVM host.
Post-Migration
After a successful migration:
Migrated VMs are running on the HVM Cluster and managed as standard instances
Source VMs remain powered off on VMware (they are not deleted automatically)
Network configuration (including static IPs) is preserved on the destination
MAC addresses may be preserved depending on plan configuration
Failed VMs can be retried individually from the plan detail page. Plans that have fully completed can be kept for audit purposes or deleted.