Windows Migration
Migrating Windows workloads from VMware vCenter to HVM Clusters is fully supported with automated VirtIO driver injection. The migration system handles driver installation and disk bus conversion automatically in most cases.
Automated Driver Injection
When a Windows VM is included in a Migration Plan, the system automatically:
Installs VirtIO guest tools on the source VM during the Prepare phase (via network download of the MSI package)
If network installation fails, falls back to ISO-based installation — the VirtIO ISO is uploaded to the VMware datastore, mounted to the VM, and drivers are installed via
msiexecCreates the target VM with temporary SATA disks so Windows can boot without VirtIO drivers
Adds a small VirtIO helper disk that triggers Windows to detect and load VirtIO drivers from the driver store
Boots the target VM and waits for Windows to register the VirtIO drivers (up to 10 minutes)
Shuts down and switches all disks to VirtIO bus — SCSI disks map to VirtIO-SCSI, IDE/SATA disks map to VirtIO Block
Removes the helper disk and ISO volumes, then starts the final VM
This entire process is handled by the Reconfigure phase and requires no manual intervention for supported Windows versions.
Supported Windows Versions
Windows Server 2016
Windows Server 2019
Windows Server 2022
Windows Server 2025
Windows 10
Windows 11
Manual Preparation (Fallback)
In rare cases where automated driver injection fails (e.g., restricted network access and no VirtIO ISO available in vCenter), you may need to manually prepare the Windows VM before migration. The steps below cover manual VirtIO driver injection for a Windows VM running on vCenter.
Note
Try the automated process first. Manual preparation is only needed if the migration fails during the Prepare or Reconfigure phases.
Prerequisites for manual preparation:
The VM is configured with EFI or BIOS boot
The VM has access to the recovery partition (or Windows Recovery Environment media)
The VirtIO drivers ISO is available
Step 1: Boot into Windows Recovery Environment
Restart the VM into Windows RE. Select a keyboard layout if prompted, then choose .
Step 2: Load storage drivers (if disks not visible)
In the Command Prompt, check disk visibility:
diskpart
list disk
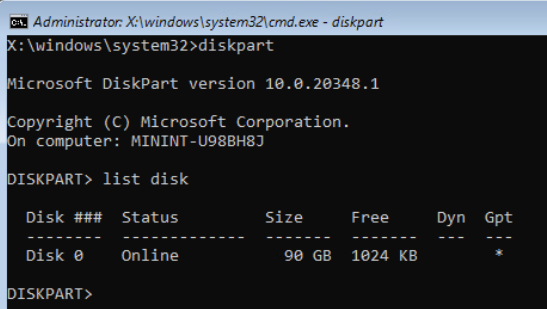
If no disks appear, mount VMware Tools from vCenter (), then load the storage driver:
list volume
Note the CD-ROM drive letter (e.g., “D”), then:
drvload "D:\Program Files\VMware\VMware Tools\Drivers\pvscsi\Win10\amd64\pvscsi.inf"
Verify disks are now visible:
diskpart
list disk
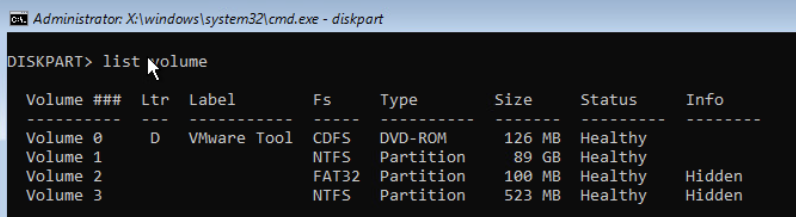
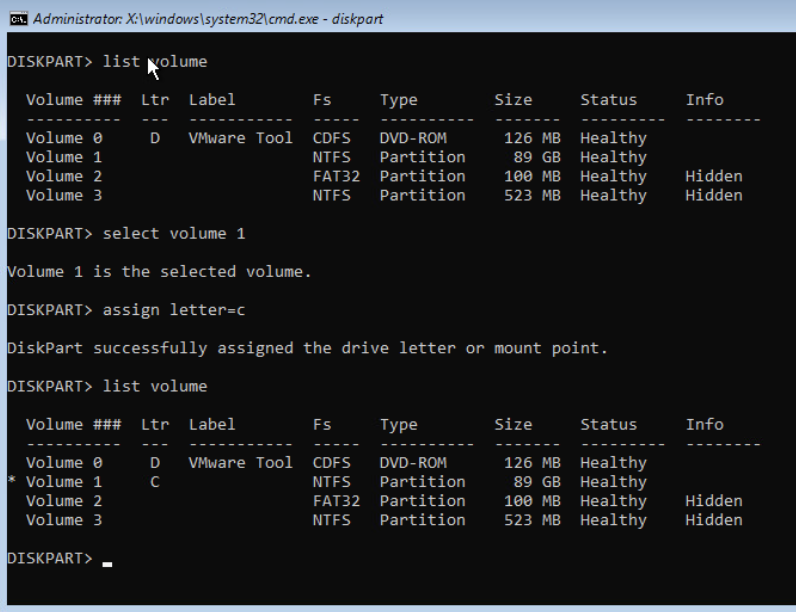
Assign drive letters if needed:
list volume
select volume 1
assign letter=c
exit
Unmount VMware Tools from vCenter when done.
Step 3: Inject VirtIO drivers
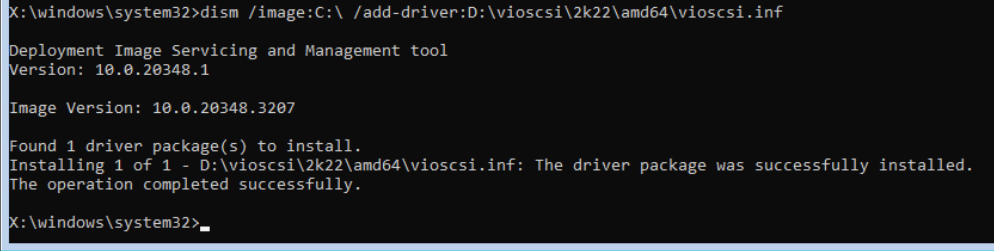
Upload the VirtIO ISO to a vCenter datastore or Content Library. Mount it to the VM via a CD-ROM device. Then inject the storage drivers:
dism /image:C:\ /add-driver:D:\viostor\2k22\amd64\viostor.inf
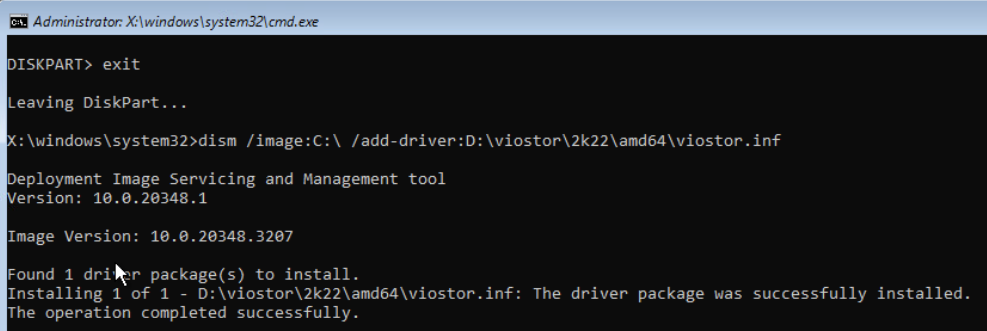
dism /image:C:\ /add-driver:D:\vioscsi\2k22\amd64\vioscsi.inf
Note
Replace 2k22 with the appropriate directory for your Windows version (e.g., 2k19, 2k16, w10, w11). Adjust drive letters to match your environment.
Close Command Prompt and click Continue to boot Windows normally.
Step 4: Install VirtIO guest tools
Once logged back into Windows, navigate to the mounted VirtIO ISO and install:
virtio-win-gt-x64.msivirtio-win-guest-tools.exe
Keep all default selections. After installation, unmount any ISOs attached to the VM.
Step 5: Power down and migrate
Shut down the VM and ensure it stays powered off (note that the VMware Cloud integration may have “AUTOMATICALLY POWER ON VMS” enabled — if so, shut down from the product UI or temporarily disable that setting). The VM is now ready to be included in a Migration Plan.
Post-Migration: VMware Tools Cleanup
After migration, VMware Tools remains installed but is non-functional on HVM. To prevent startup errors:
Navigate to in the Windows guest and disable VMware Tools Core Service
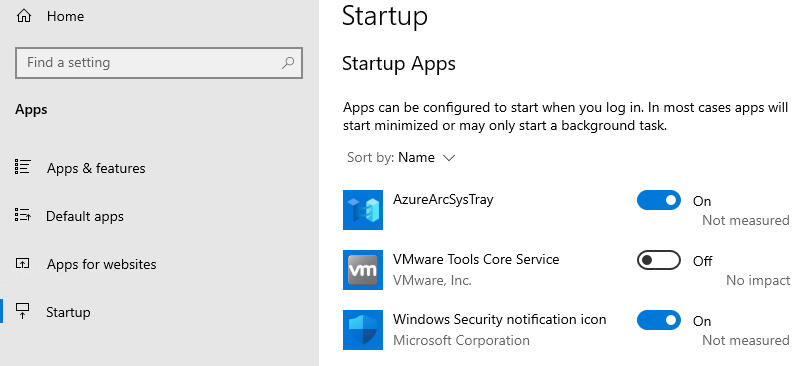
Optionally, fully uninstall VMware Tools using Microsoft’s program removal troubleshooter