Hardware Passthrough
HPE Morpheus Software includes hardware passthrough and pooling support for VMs provisioned to HVM Clusters. This support extends to GPU, USB and NVME devices. In order to be usable, such devices must be attached to a HVM Host or to multiple HVM Hosts. HPE Morpheus Software includes controls to detach hardware devices from the underlying OS on the hypervisor host and add them to a pool where they are available for consumption by VMs. GPU hardware can be attached to VMs at provision time through custom Service Plans or on an ad-hoc basis by manually attaching hardware to existing VMs. Other supported hardware types must be past through to the VM after provisioning.
This page describes whole-device passthrough. NVIDIA vGPU slicing keeps the GPU bound to the NVIDIA Host driver and assigns programmed SR-IOV virtual functions instead of the full physical card. For that workflow, see NVIDIA vGPU Slicing.
Creating Service Plans
When utilizing GPU hardware, it may be most convenient to use a custom Service Plan. This allows administrators to pre-configure the number of discrete hardware cards to attach to the VM at provision time. Once provisioned, the specified number of GPUs will be attached to the VM. For workloads which are provisioned and torn down regularly, this will save additional steps of manually attaching GPUs available from the pool. On teardown, attached devices of all types are released back to the pool. Though in some cases utilizing Service Plans may be most convenient, as you’ll see in the next sections it is not strictly required. It is also possible to manually attach GPUs or other hardware types on any existing VM runnning on HVM Clusters.
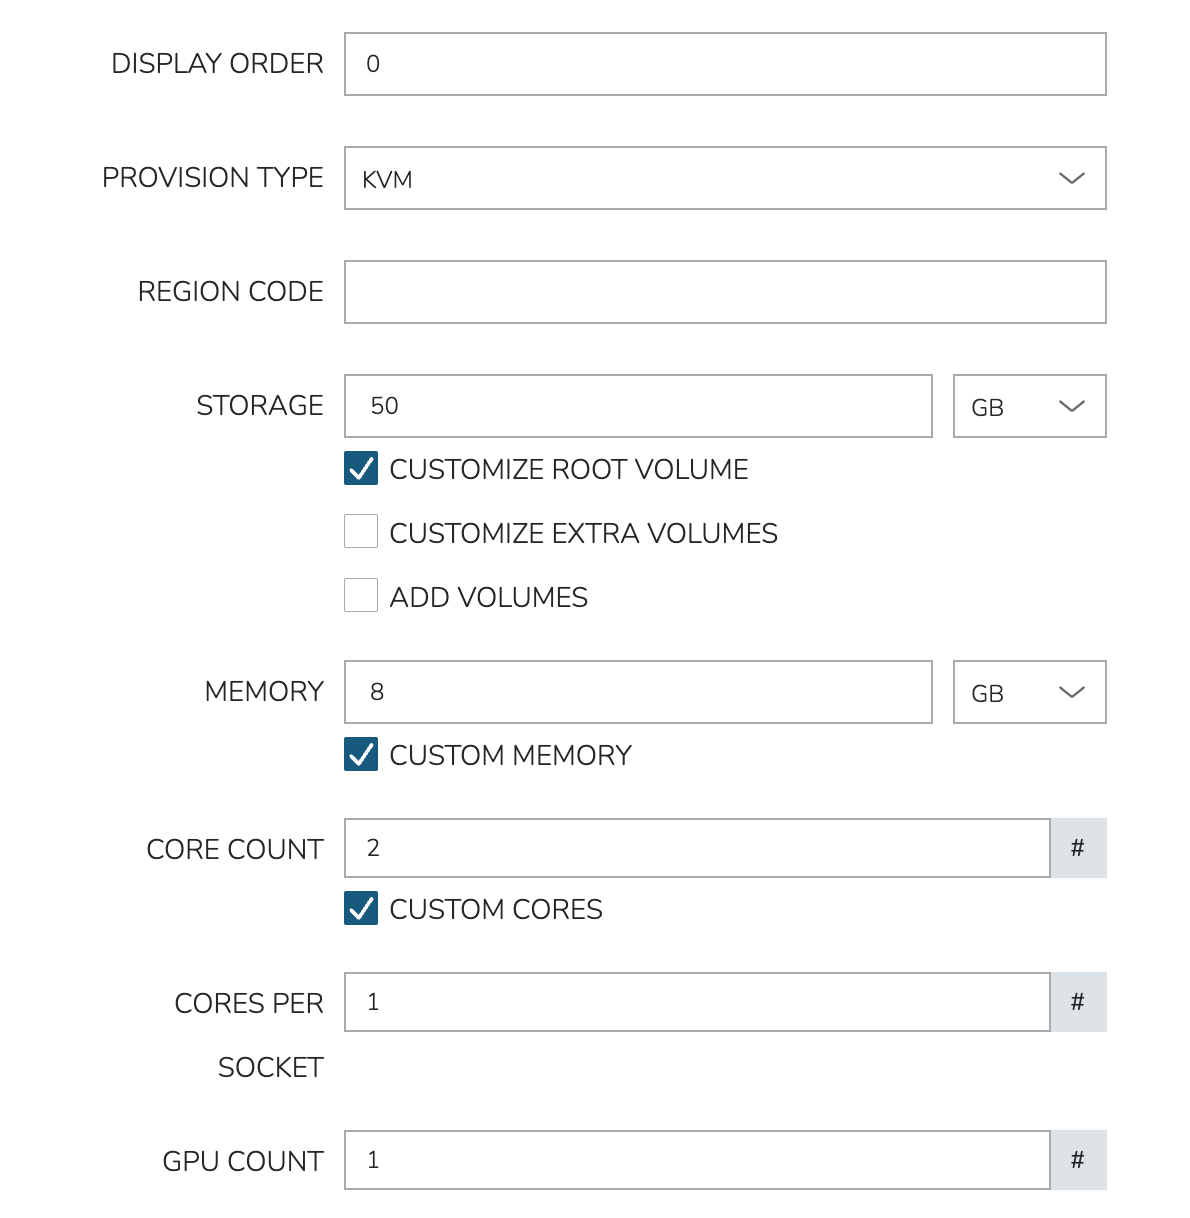
To create a new Service Plan, navigate to Administration > Plans & Pricing. Click + Add and then Service Plan. In the New Service Plan modal, first set the PROVISION TYPE configuration to “KVM.” This will update the available configuration fields and reveal GPU Count and GPU Type. Select a physical GPU Type for whole-card passthrough. Indented Segment Types represent NVIDIA vGPU profiles and use the separate slicing workflow. See Plans & Pricing for complete Service Plan guidance.
Viewing and Assigning Hardware Devices
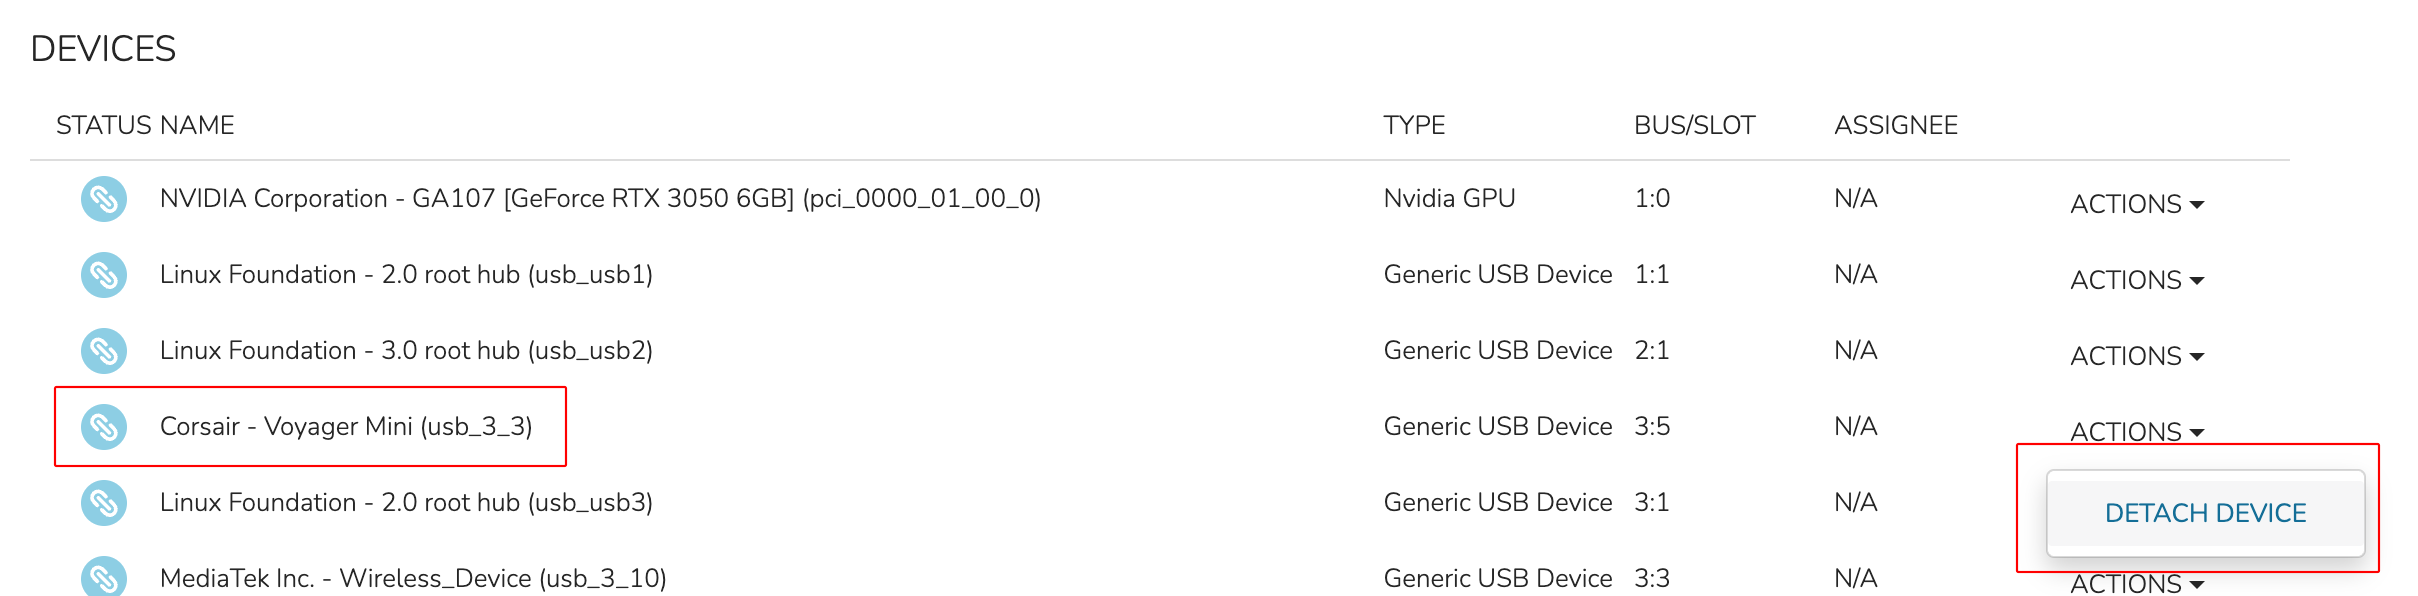
Hardware Devices are surfaced at the Host detail level and the VM (server) detail level through a Devices tab. The Host detail will show all attached hardware devices and their current status: Attached (to the host), detached (from the host), or assigned (to a VM). The VM detail will show only hardware devices currently attached to that VM. To begin consuming hardware devices with HVM Cluster VMs, look again at the list in the Devices tab on the Host detail page. Detach a piece of hardware from the host using the ACTIONS dropdown for that piece of hardware. As shown in the screenshot below, DETACH DEVICE is selected for a USB device.
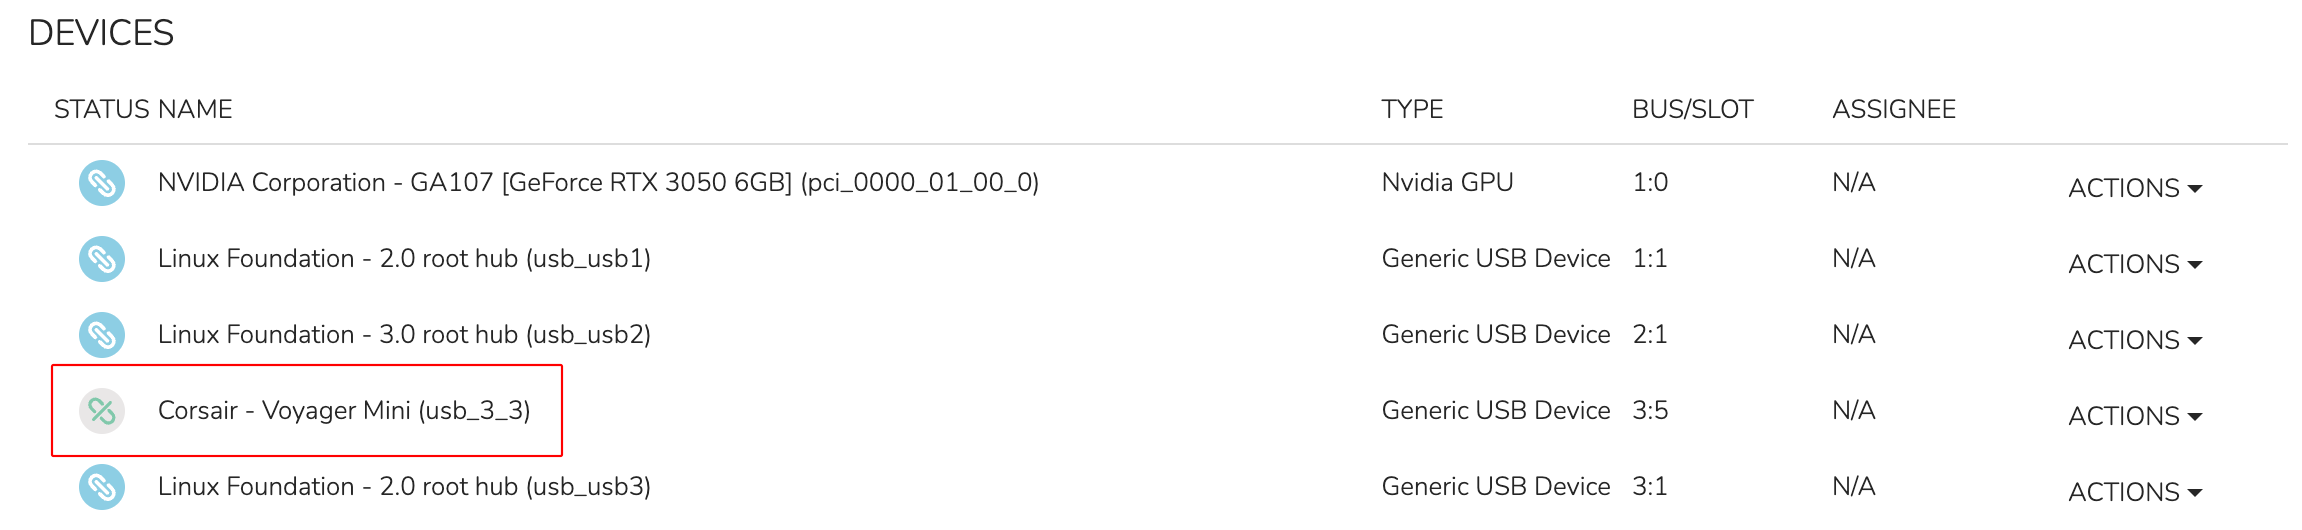
Once detached, the status of the device is changed to “Detached” (see screenshot below) and the device is available for consumption by VMs running on this host.
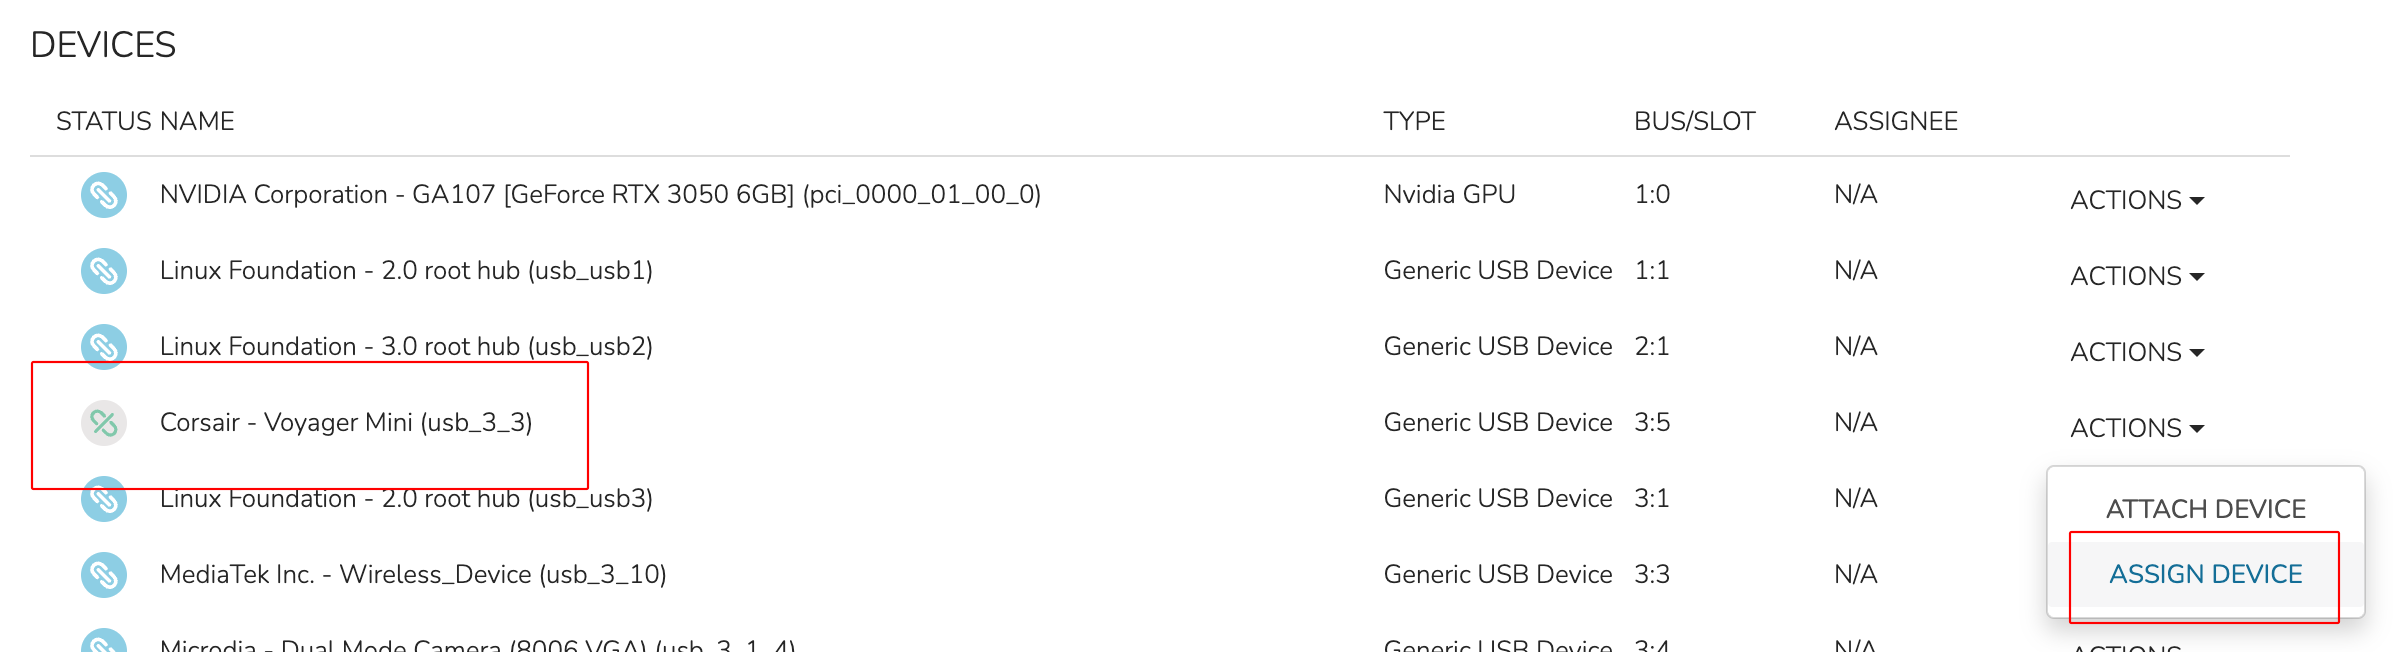
To assign the hardware to a specific VM, click the ACTIONS dropdown once again for the now-detached hardware. Now, click ASSIGN DEVICE.
Within the ASSIGN DEVICE modal that will appear, select the server for device assignment and click EXECUTE.
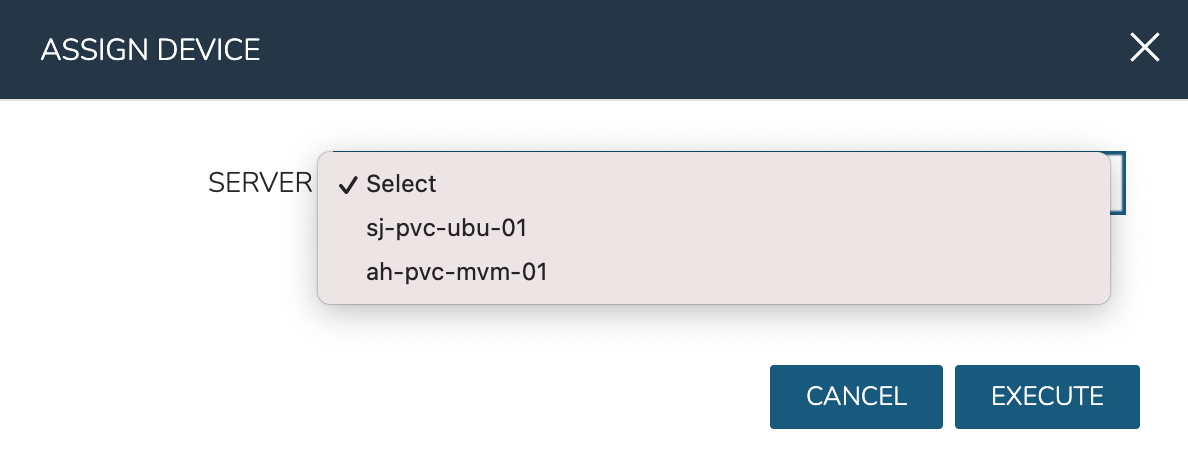
The icon and status for the device in the hardware list has now changed to “Assigned.” If we then open a console session with this VM, we can see the USB device is assigned successfully and is usable by the guest OS.

The same process can be used to detach and assign GPU or NVME devices.
GPU Passthrough Example
In a previous section, a Service Plan was created which consumes a GPU when a VM is provisioned using that Plan. This section shows an example provisioning a workload using that Plan and a GPU-accelerated workload running on the VM. In this example, there is an Nvidia GeForce RTX 3050 connected to one of the HVM Hosts. By passing the GPU hardware through to a provisioned VM, hardware-accelerated AI workloads can be run on the VM.
Begin by navigating to . The list of all currently-managed Instances is here along with high level information (power state, etc). To begin a new Instance, click + ADD. Choose type HVM and click NEXT. On the next pane, choose the Group and Cloud in which your desired HVM Cluster resides, name the Instance, and click NEXT.
On the CONFIGURE tab, the main thing to note for this example is the PLAN configuration. This dropdown contains some default Plans that are included with HPE Morpheus Software and compatible with the HVM provisioning technology (named “1 CPU, 1GB Memory”, etc). This dropdown also includes user-created Plans, such as those you’ve created to consume GPU hardware. In the screenshot below, you can see the “GPU Plan” was selected.
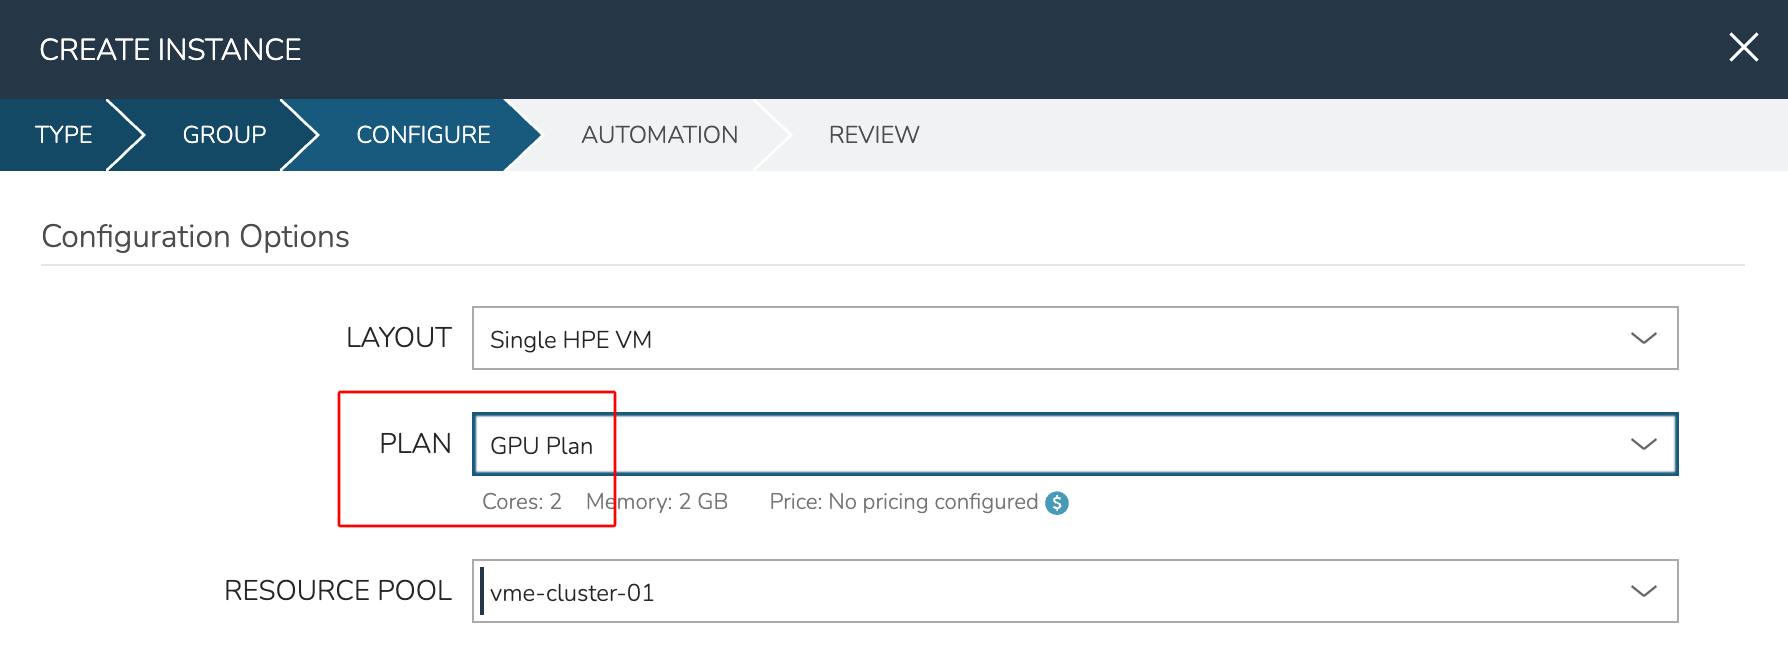
From here, complete the Instance provisioning wizard selecting any automation or lifecycle configurations and wait for the Instance provisioning to complete.
With provisioning complete, check the attached device(s) from the HPE Morpheus Software UI. This is done from the VM level rather than the Instance level. From the Instance detail page, click on the Resources tab. Click on the name of the desired VM to access the VM detail page. Click on the Devices tab. As in the screenshot below, the attached GPU should be shown.

To go further, open a console session to the new VM either through HPE Morpheus Software UI or by connecting to the VM over SSH from a local terminal session. Use the lspci command to view all devices connected to PCI buses. The attached GPU should be shown here as it is in the UI.
At this point, the VM is ready to run GPU-accelerated workloads normally. To test this, I’ll run Ollama which is an open-source tool designed to make it easy to run large language models (LLMs) locally. In the screenshot below, see the AI chatbot response to an input. This result took only a few seconds thanks to GPU hardware acceleration.
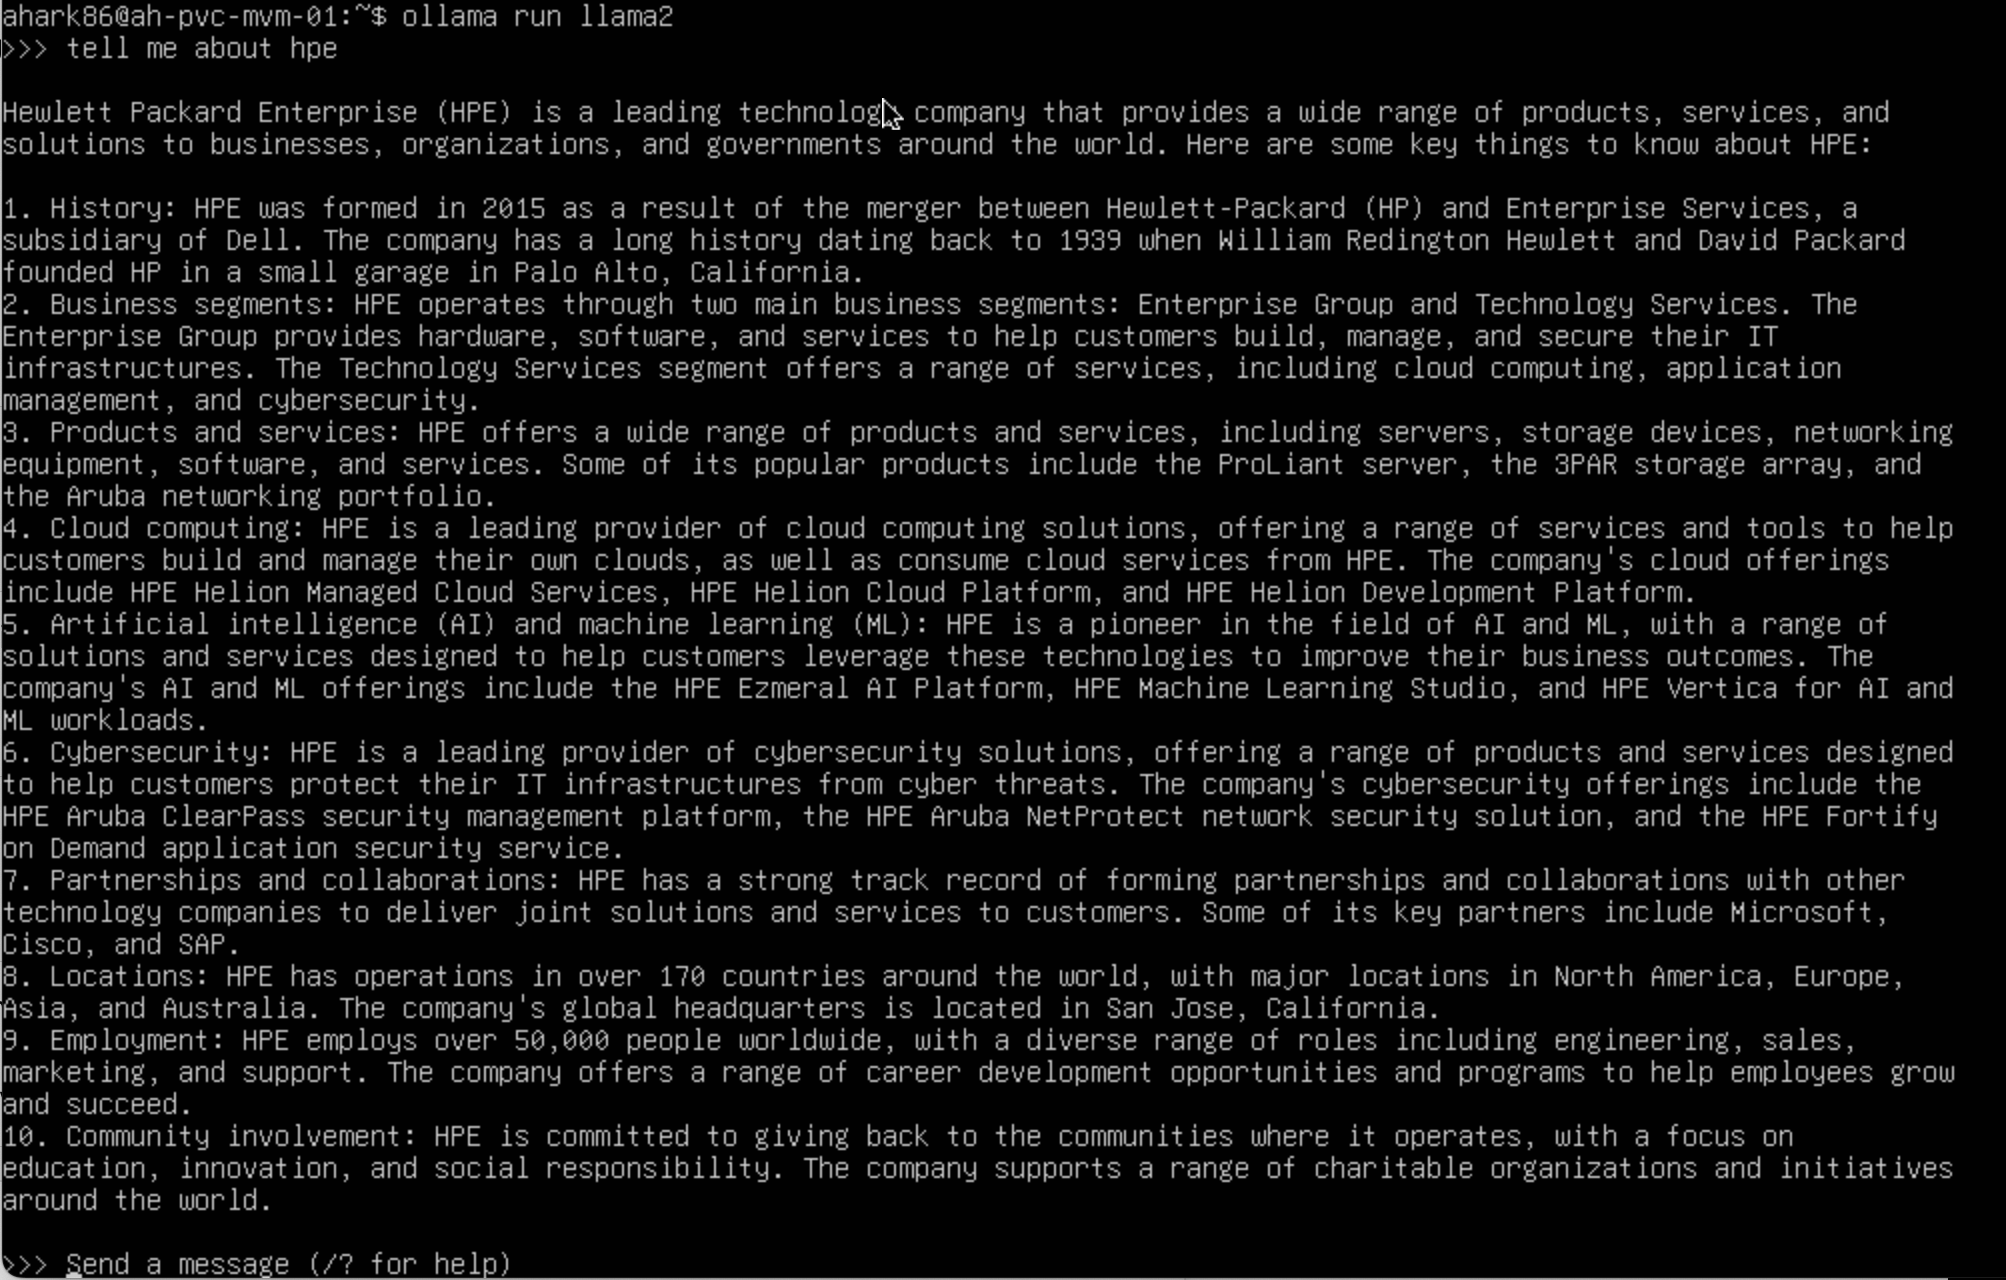
With the request completed, we can run the ollama ps command which confirms the model was running under GPU acceleration.
