Settings
The Administration > Settings section sets global configuration parameters for the HPE Morpheus Software appliance, whitelabeling, provisioning, monitoring, backups, logs, software licenses, and the license for HPE Morpheus Software itself.
Appliance
Appliance Settings
- Appliance URL
The default URL used for Agent install and Agent functionality. All Instances and Hosts must be able to resolve and reach this URL over 443 for successful agent install and communication.
Note
Alternate Appliance URLs can be configured per Cloud in the Edit Cloud > Advanced Options section.
- Internal Appliance URL (PXE)
For PXE-Boot your appliance needs to be routable directly with minimal NAT masquerading. This allows one to override the default appliance url endpoint for use by the PXE Server. If this is unset, the default appliance url will be used instead.
- API Allowed Origins
A CORS-related field which specifies the origins that are allowed to access the HPE Morpheus Software API. For example, if you were designing a web application which needed to make AJAX calls to HPE Morpheus Software API. The origins should be specified here. By default, all origins are allowed. When this field is filled, an exclusive whitelist of allowed origins is established.
- Cloud Sync Interval
Data is refreshed through cloud integrations at the interval specified here in seconds, the default value is 300 seconds (five minutes). Appliances managing a very large number of clouds may be adversely affected by setting this value too low.
- Usage Retainment
Determines how many days to keep account usage (metered costing data) records. Retainment period is not set by default. Usage records will remain indefinitely if Usage Retainment is not set. Note this does not affect generated Invoice records.
- Incident Retainment
Enter the number of days HPE Morpheus Software should keep incident records in the database. In general, this setting can be left alone but in certain cases may need to be adjusted as very large incident database tables can affect the stability of the application.
- Stats Retainment
Select 30, 60 or 90 days period for stats retainment. Selecting a larger period gives the ability to analyze stats, such as Instance metrics, over a longer period of time. For example, in the Monitoring tab of an Instance detail page, users can select a 60 or 90-day analysis period if the stats have been retained that long
- Denied Hosts
A comma-delimited list of IP addresses and/or hostnames which should not be allowed sources for HTTP Tasks or REST-populated Option Lists.
- Approved Hosts
A comma-delimited list of IP addresses and/or hostnames which are the only approved sources for HTTP Tasks or REST-populated Option Lists. By entering any values here, all others are automatically denied.
- Enable SSL Verification of Agent (Communications)
Enabling SSL Verification of Agent Communications requires a valid Certificate be installed on the Appliance.
- Disable SSH Password Authentication
Only allow ssh login using SSH keys. When true, SSH Password Authentication will not be enabled for VM’s and Hosts provisioned after the setting is enabled.
- Default Appliance Locale
Sets the default language and region for all users on the HPE Morpheus Software appliance. Users with individual language preferences may also override this selection on their User Settings page
- Default Console Gateway
Select a configured VDI Gateway to route Instance and Host console sessions. The gateway can use the same Worker runtime as a Distributed Worker, but it requires a VDI Gateway registration and API key. See Distributed Workers and VDI Gateways.
- Max Option List Size
Sets a maximum size for Option Lists (such as those sourced from REST calls to a remote server) to preserve appliance performance in the event that a very large payload is inadvertently accessed. The entered number is multiplied by 1000 (for example, entering “1” results in a maximum list size of 1000).
- Dashboards to Display
A typeahead field which will show all Dashboards available to the appliance from Dashboard-type plugins. Select all desired Dashboards and they will be displayed in the order set. Dashboards can be dragged up and down the list to set the order correctly.
Tenant Management Settings
- Registration Enabled
If enabled, the appliance login screen will have a “NEED AN ACCOUNT? SIGN UP HERE” link added, enabling new Tenant registration.
- Default Tenant Role
Sets the default Tenant Role applied to Tenants created from Tenant Registration.
- Default User Role
Sets the default User Role applied to the User created from a Tenant Registration.
User Management Settings
- Min Password Length
User passwords must at least be as many characters in length as the entered value
- Min Password Uppercase
User passwords must include at least as many uppercase characters as the entered value
- Min Password Numbers
User passwords must include at least as many numerals as the entered value
- Min Password Symbols
User passwords must include at least as many special characters as the entered value
- Session Expires (Minutes)
A user session is forcibly logged out after the entered number of minutes of inactivity
- Session Warning (Minutes)
A pop-up warning is shown to the user when they have been inactive for the number of minutes entered. Example: If sessions are set to expire after 90 minutes, warn the user after 60 minutes if you intend to provide 30 minutes advance warning
- Expire Password After (Days)
User account passwords will expire after the entered number of days. Enter 0 or leave the field empty to opt out of this feature.
- Disable User After Attempts (Number of Attempts)
Disable a User account after a specified number of failed login attempts. Enter 0 or leave the field empty to opt out of this feature.
- Disable User If Inactive For (Days)
Disable a User account if inactive for the entered number of days. The User will not be able to log into the appliance again until another User with sufficient rights enables the account. Enter 0 or leave the field empty to opt out of this feature.
- Send warning email before deactivating (Days)
Enter the number of days prior to account deactivation that a warning email should be sent. For example, enter “5” to warn the User when they are five days short of the deactivation time entered in the prior field. Enter 0 or leave the field empty to opt out of this feature.
Email Settings
In this section, you can configure an SMTP server for email notification delivery. You will need to provide HPE Morpheus Software the following information, your mail server systems administrator can assist you in filling these fields and with the preferred encryption method.
From Address
SMTP Server
SMTP Port
SSL Enabled
TLS Encryption
SMTP User
SMTP Password
We recommend that you add the HPE Morpheus Software server to your SMTP whitelist as well as using user authentication as an additional security measure.
Once you have added your SMTP server information into HPE Morpheus Software, scroll down to the bottom of the page and press the blue SAVE button which can be found under the Enabled Clouds section.
When you have saved your SMTP server settings in the HPE Morpheus Software appliance you will then need to restart the UI. To restart the morpheus-ui, connect to your HPE Morpheus Software server via SSH and run the below command:
sudo morpheus-ctl restart morpheus-ui
Important
If you do not restart morpheus-ui, the notifications will not be sent. Please note it can take up to three minutes for the UI to become reachable again.
Twilio SMS Settings
Configure SMS text message delivery for HPE Morpheus Software alerts. Previously, customers could use HPE Morpheus Software’ own account for delivery, but for security reasons clients must now supply their own. Complete the fields indicated below and then restart all HPE Morpheus Software nodes to apply the changes.
Account SID: Twilio Account SID
SMS From #: The “From” number to receive the text message from
Auth Token: The Twilio API authentication token for your account
Proxy Settings
The HPE Morpheus Software Appliance can be configured to communicate through a Proxy server for Cloud API’s and Agent communication back to the Appliance.
Note
Additional Proxy configuration is available in the Infrastructure > Network > Proxies section. Added Proxies can be scoped to Clouds in the Edit Cloud > Advanced Options section of the Cloud.
Add a Global Proxy server by entering the following:
Proxy Host
Proxy Port
Proxy User
Proxy Password
Proxy Domain
Proxy Workstation
Currency Settings
In HPE Morpheus Software, Tenants are separate environments which can be defined as using currencies that are unique from one Tenant to the next. In addition, these currencies may be different from the currency in which Price Sets have been defined. In order to present pricing to Subtenant users in their designated currency, HPE Morpheus Software allows for integration with currency conversion services “open exchange rates” and “fixer.io”. This article goes through the process of setting up the integration and how it works to determine pricing conversions.
Integrating With a Currency Exchange Provider
Navigate to Administration > Settings > Appliance
Under the Currency Settings heading, make a “Currency Provider” selection
Enter your “Provider API Key”
The service is now integrated and can be used as described in the next section.
Consuming Currency Exchange in HPE Morpheus Software
Currency exchange data is synced from the integrated provider once every 12 hours. When needed, Morpheus will use this cached data to present currency conversions rather than hitting the API directly each time. This limits the total number of API hits and reduces costs.
Exchanged currency values will be shown under conditions similar to the following scenario:
A user is working in a Subtenant configured for Currency B. The user is attempting to provision an instance with pricing sets that have only been defined in Currency A. Morpheus will convert the pricing data from currency A to Currency B for this user (and all users in this Subtenant) since price conversion has been enabled.
Enabled Clouds (Types)
Controls which types of Cloud can be created.
When a Cloud type is disabled, it will be removed from the available options when adding new Clouds in
Infrastructure > Clouds. Existing Clouds are not affected by changes to this setting.
Whitelabel
Whitelabel Settings ENTERPRISE
Enterprise — Not available in: Essentials, Advanced
Whitelabel customization is available only with an Enterprise license.
Overview
HPE Morpheus Software Tenants can be WhiteLabeled with custom Logos, Colors, Copy, and custom CSS. Sub-Tenants can be individually white-labeled, or the Master Tenant Whitelabel can apply to all Sub-Tenants.
- Enable Whitelabel
Turns on the configured Whitelabel settings. Disabling will return the Appliance to the default colors and logos, but the configured options will remain saved and will apply if Whitelabel is re-enabled.
- Appliance Name
Replaces HPE Morpheus Software in page titles.
- Header Logo
Top left header logo. Uploaded image is resized to 38 pixels high with a proportional width at that height.
- Disable Support Menu
Enable this flag to hide the support dropdown menu in the header.
- Support Menu Links
Customize support links. Label Code can be used for translations and is optional. Be sure to specify fully qualified url if linking to external sites.
- Security Banner
- The Security Banner section in
/admin/settings#!whitelabeldisplays content on the login screen for Security and Consent messaging and warnings. Applicable at Global and Tenant levels
Security Banner input field accepts plain text and markdown
Content is displayed below login section in scoped
/login/authpages.
- The Security Banner section in
- Footer Logo
Footer Logo in bottom left. Uploaded image is resized to 27 pixels high with a proportional width at that height.
- Login Logo
Logo shown on Login screen. Uploaded image is resized to 192 pixels wide with an unbound height proportional to that locked width.
- Favicon
Must be a .ico file type.
- Reset
When selected and Whitelabel settings are saved, associated logo is returned to blank default value.
Colors
Update Colors by entering HEX value or selecting the Color Selector pop-up next to each filed and selecting a color.
Header Background
Header Foreground
Nav Background
Nav Foreground
Nav Hover
Primary Button Bg
Primary Button Fg
Primary Button Hover Bg
Primary Button Hover Fg
Footer Background
Footer Foreground
Login Background
Override CSS
Override CSS settings by entering CSS in Override CSS field.
Example: (this will add one continues background image to the Header)
header #topHeader {
        background-image: url(http://image_url.png);
        }
header {
        background-image: url(http://image_url.png);
        }
Copy
Add custom Copyright String, Terms of Use, Privacy Policy contained in the Footer text and links in the App and on the login page and emails.
Available Copy fields
Copyright String
Terms and Privacy String
Terms of Use
Privacy Policy
Note
Terms of Use and Privacy Policy Footer links will load internal pages at
https://applaince_url/privacy-policyandhttps://applaince_url/terms-of-usedisplaying the entered info as plain text. The Terms and Privacy String will update the legal text displayed on the HPE Morpheus Software login page. This field takes any custom HTML markup allowing you to link to the internal legal pages or to your own outside legal pages if you prefer.
UI Loading Page
When the HPE Morpheus Software UI is restarted or loading, a default “Morpheus is Loading” page is displayed. This page can be changed by adding the following to /etc/morpheus/morpheus.rb and adjusting the values.
Note
morpheus-ctl reconfigure must be ran for any chnages to /etc/morpheus/morpheus.rb to take effect.
nginx['web_root_internal'] = "/opt/morpheus/embedded/nginx/html"
nginx['loading_pages']['max_loops'] = 6 * 10 # 10 secs per loop x 6 times to get 60 seconds * 10 to get to 10 minutes
nginx['loading_pages']['timeout_page'] = '/timeout.html'
nginx['loading_pages']['iteration_time'] = 10_000
nginx['loading_pages']['loading_page_title'] = 'Morpheus Loading'
nginx['loading_pages']['loading_page_h1'] = 'Morpheus is Loading...'
nginx['loading_pages']['loading_page_h2'] = 'please wait'
nginx['loading_pages']['timout_page_title'] = 'Morpheus timeout, please try again...'
nginx['loading_pages']['timout_page_h1'] = 'Timeout waiting for Morpheus to load, click below to try again.'
nginx['loading_pages']['failure_page_title'] = 'Morpheus Server Error'
nginx['loading_pages']['failure_page_h1'] = 'Morpheus Server Error'
nginx['loading_pages']['failure_page_h2'] = 'Please contact your system administrator for assistance.'
Email Templates
Email Templates
HPE Morpheus Software sends out email to its users periodically to alert for various conditions such as an Instance provisioning success, warnings about upcoming Instance expiration, requests for password reset links, and more. HPE Morpheus Software includes system-default email templates for all of these emailed conditions but allows users to create their own email templates to override the default template.
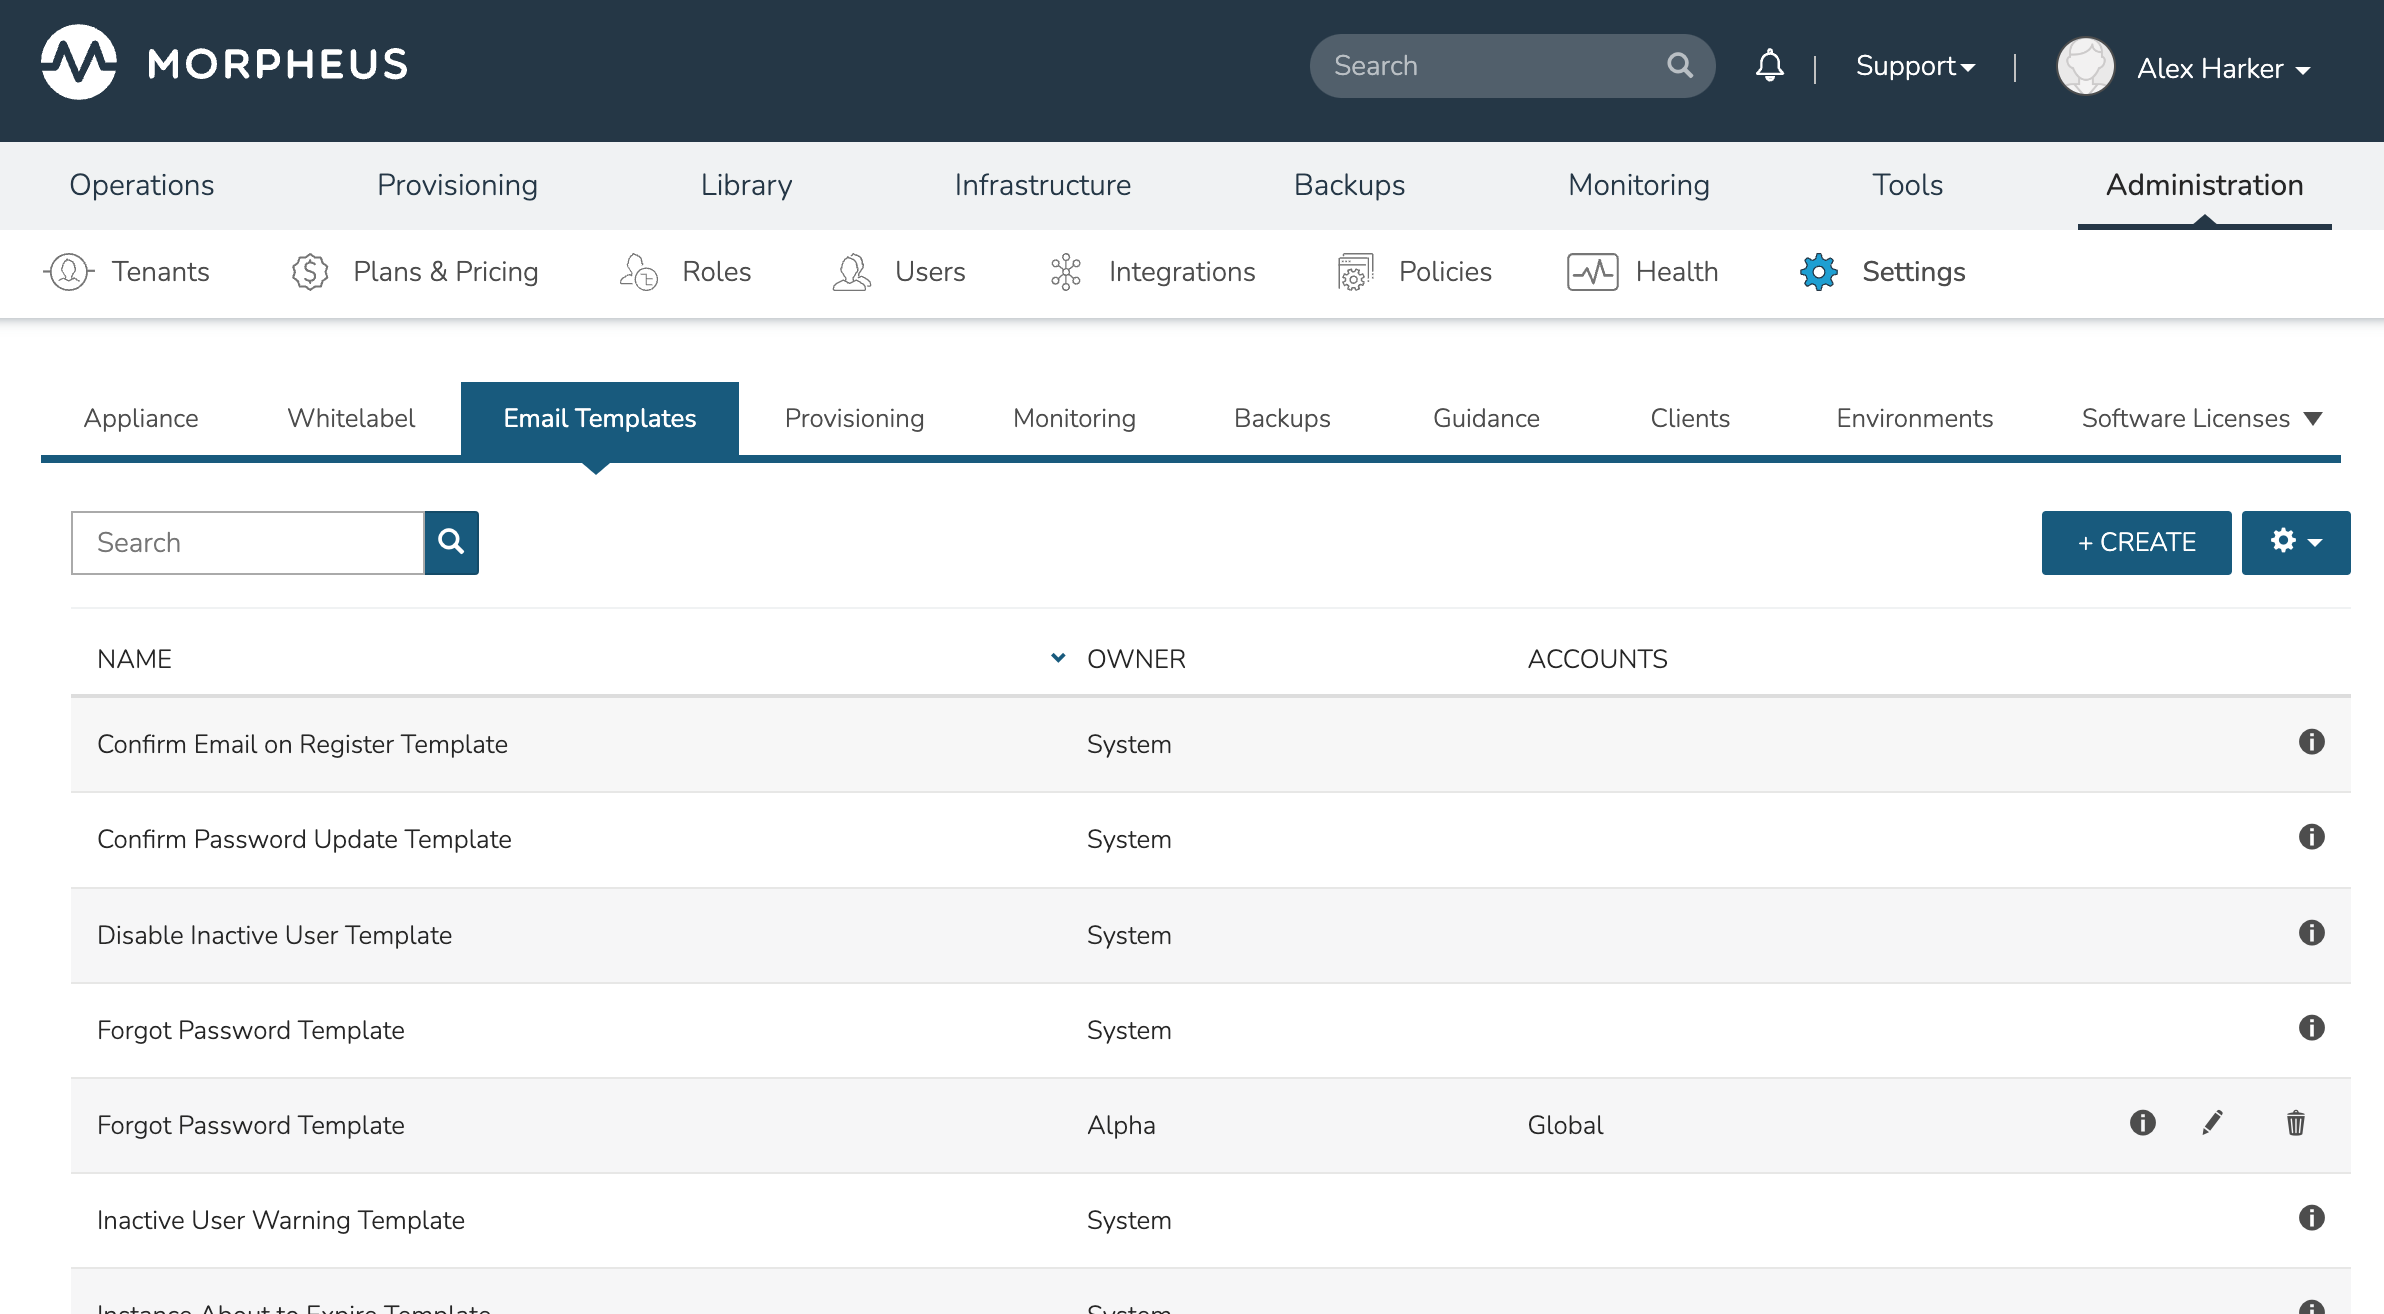
On accessing the Email Templates tab, users will see a list of all email templates that currently exist. We can also see the owner which created the template as well as the associated Account (Tenant). System-default templates are shown as being owned by “System” and show no associated Account (Tenant). When a Master Tenant user creates a template, the option is given to tie the template to an Account or to make a global template. The Accounts column will show “Global” for global templates. Templates will apply in order of specificity: Tenant-specific templates apply first, then custom global templates, and finally system templates if no others exist for that email type.
Important
Email templates apply in order of specificity. Tenant-specific templates apply over custom global templates which apply over system-default templates.
Creating Templates
Before creating the first template, it’s important to realize email from custom templates will still come wrapped in the standard HPE Morpheus Software email headers and footers. It will also have included styling. This styling comes directly from your Tenant whitelabel configuration and will include HPE Morpheus Software standard styling or your custom whitelabel styling depending on appliance configuration. The template itself should only include email body content which will be inserted within the styling wrapper.
Important
It is possible to break the functionality of certain types of generated email by creating a custom template. For example, in a password reset email, you must ensure the password reset button is still included with the template. Other functionality-breaking scenarios may also be possible. Review the system-default template of any email type to copy syntax examples for such vital components.
Some template types will have variables accessible, such as the logged in user’s name (to address the email) or an Instance name. To see the available variables, click on the info button for the system-default template of the type you wish to create. You’ll see the variables mentioned in a comment at the bottom of the template such as in this example Confirm Password Update Template:
<p>{{{i18n "com.bertramlabs.plugins.accounts.password.email.greeting"}}}</p>
<p>{{{i18n "com.bertramlabs.plugins.accounts.password.email.message"}}}</p>
<a href={{{url}}}>{{{i18n "com.bertramlabs.plugins.accounts.password.email.linkLabel"}}}</a>
<p>{{{i18n "com.bertramlabs.plugins.accounts.password.email.signature"}}} </p>
<!-- available hbs variables are user.displayName and user.username -->
To begin creating a new template, from the Email Templates tab of the global settings page (Administration > Settings), click + CREATE. The following configurations must be set:
TYPE: Select the email type for the new template
TEMPLATE: The HTML markdown for the new custom email template
TENANTS: This option is only available in the Master Tenant. Select a specific Tenant to tie the template to that Tenant or leave it empty to create a global template
The following is an example of a Forgot Password Template. Note that it calls in the variable for the associated user display name and username.
<p>Hello {{{user.displayName}}},</p>
<p>You have requested to reset the password for the account with username: {{{user.username}}}.</p>
<p>To reset the password, please click the button below. If you did not make this request, you can ignore this email but you should change your password.</p>
<a href='{{{forgotPasswordUrl}}}' class="btn-primary">Magical Password Reset Button</a>
Provisioning
Provisioning Settings
- Allow Cloud Selection
Displays or hides Cloud Selection dropdown in Provisioning wizard.
- Allow Host Selection
Displays or hides Host Selection dropdown in Provisioning wizard.
- Require Environment Selection
Forces users to select and Environment during provisioning
- Show Pricing
Displays or hides Pricing in Provisioning wizard and Instance and Host detail pages.
- Hide Datastore Stats On Selection
Hides Datastore utilization and size stats in provisioning and app wizards
- Cross-Tenant Naming Policies
Enable for the
sequencevalue in naming policies to apply across tenants- Reuse Naming Sequence Numbers
When selected, sequence numbers can be reused when Instances are removed. Deselect this option and HPE Morpheus Software will track issued sequence numbers and use the next available number each time.
- Deployment Archive Store
Default Storage Provider for storing Deployment Archives.
Note
Storage Providers can be configured and managed in the Infrastructure > Storage section.
Cloud-Init Settings
HPE Morpheus Software can add global users for Linux and Windows at provision time. Cloud-init/Cloudbase-Init or VMware Tools installed on the provisioned virtual images is required.
- Linux
Username: Enter User to be added to Linux Instances during provisioning.
Password: Enter password to be set for the above Linux user.
KeyPair: Select KeyPair to be added for the above Linux user.
Note
Either a password, keypair, or both can be populated for the Linux user. Keypairs can be added in the Infrastructure > Keys & Certs section.
Windows Settings
Administrator Password: Enter password to be set for the Windows Administrator User during provisioning.
PXE Boot Settings
- Default Root Password
Enter the default password to be set for Root during PXE Boots.
App Blueprint Settings
Determines the Default Blueprint Type selected in new App Wizard
Morpheus
ARM Template
CloudFormation
Terraform
Kubernetes Spec
Helm Chart
Terraform Settings
Terraform Runtime: Select “auto” or “manual”. When selecting “auto”, HPE Morpheus Software will automatically download and use the Terraform version indicated in the VERSION field on the Spec Templates that make up a Terraform Instance type or Blueprint (only up to v1.5.5). When selecting “manual”, HPE Morpheus Software will use the version of Terraform installed on your appliance.
Monitoring
HPE Morpheus Software Monitoring Settings
- Auto Create Checks
When enabled a Monitoring Check will automatically be create for Instances and Apps.
- Availability Time Frame
The number of days availability should be calculated for. Changes will not take effect until your checks have passed their check interval.
- Availability Precision
The number of decimal places availability should be displayed in, can be anywhere between 0 and 5. Instance availability is shown on the Instance detail page (and used elsewhere) and refers to the percentage of time the workload is up.
- Default Check Interval
The default interval to use when creating new checks.
Note
Monitoring Checks can be manually configured if Auto Create Checks is disabled.
Service Now
ServiceNow Monitoring Integration Settings
Note
A ServiceNow Integration must be already configured in Administration > Integrations to enable the ServiceNow Monitoring Integration.
- Enabled
Enables the ServiceNow Monitoring Integration
- Integration
Select from a ServiceNow Integration added in Administration > Integrations
- New Incident Action
The Service Now action to take when a Morpheus incident is created.
- Close Incident Action
The Service Now action to take when a Morpheus incident is closed.
Incident Severity Mapping
HPE Morpheus Software Severity |
ServiceNow Impact |
Info |
Low/Medium/High |
Warning |
Low/Medium/High |
Critical |
Low/Medium/High |
Logging Settings
Overview
Open these settings at .
HPE Morpheus Software contains a built-in logging solution that aggregates logs from hosts and services. Logs are displayed, searchable, and filterable in the Instance, App, Host and global Logs (Monitoring > Logs) sections. Logs can also be forwarded using Syslog forward rules to any external solution that supports Syslogs.
The logs displayed in the Instance, App, Host and overall Logs (Monitoring > Logs) sections are only from managed VMs and Hosts that have the HPE Morpheus Software Agent installed. HPE Morpheus Software Agent will watch /var/logs for any .log file and report them back accordingly. Containerized Instances can be configured to show additional logs by configuring the LOG FOLDER in the Library NODE TYPE. Logs from any .log file in the specified folder will be forwarded by the HPE Morpheus Software Agent to the HPE Morpheus Software appliance or forwarded with Syslog forward rules.
Note
The Logs section does not contain HPE Morpheus Software appliance logs, which can be found in /var/log/morpheus/ and in Administration > Health.
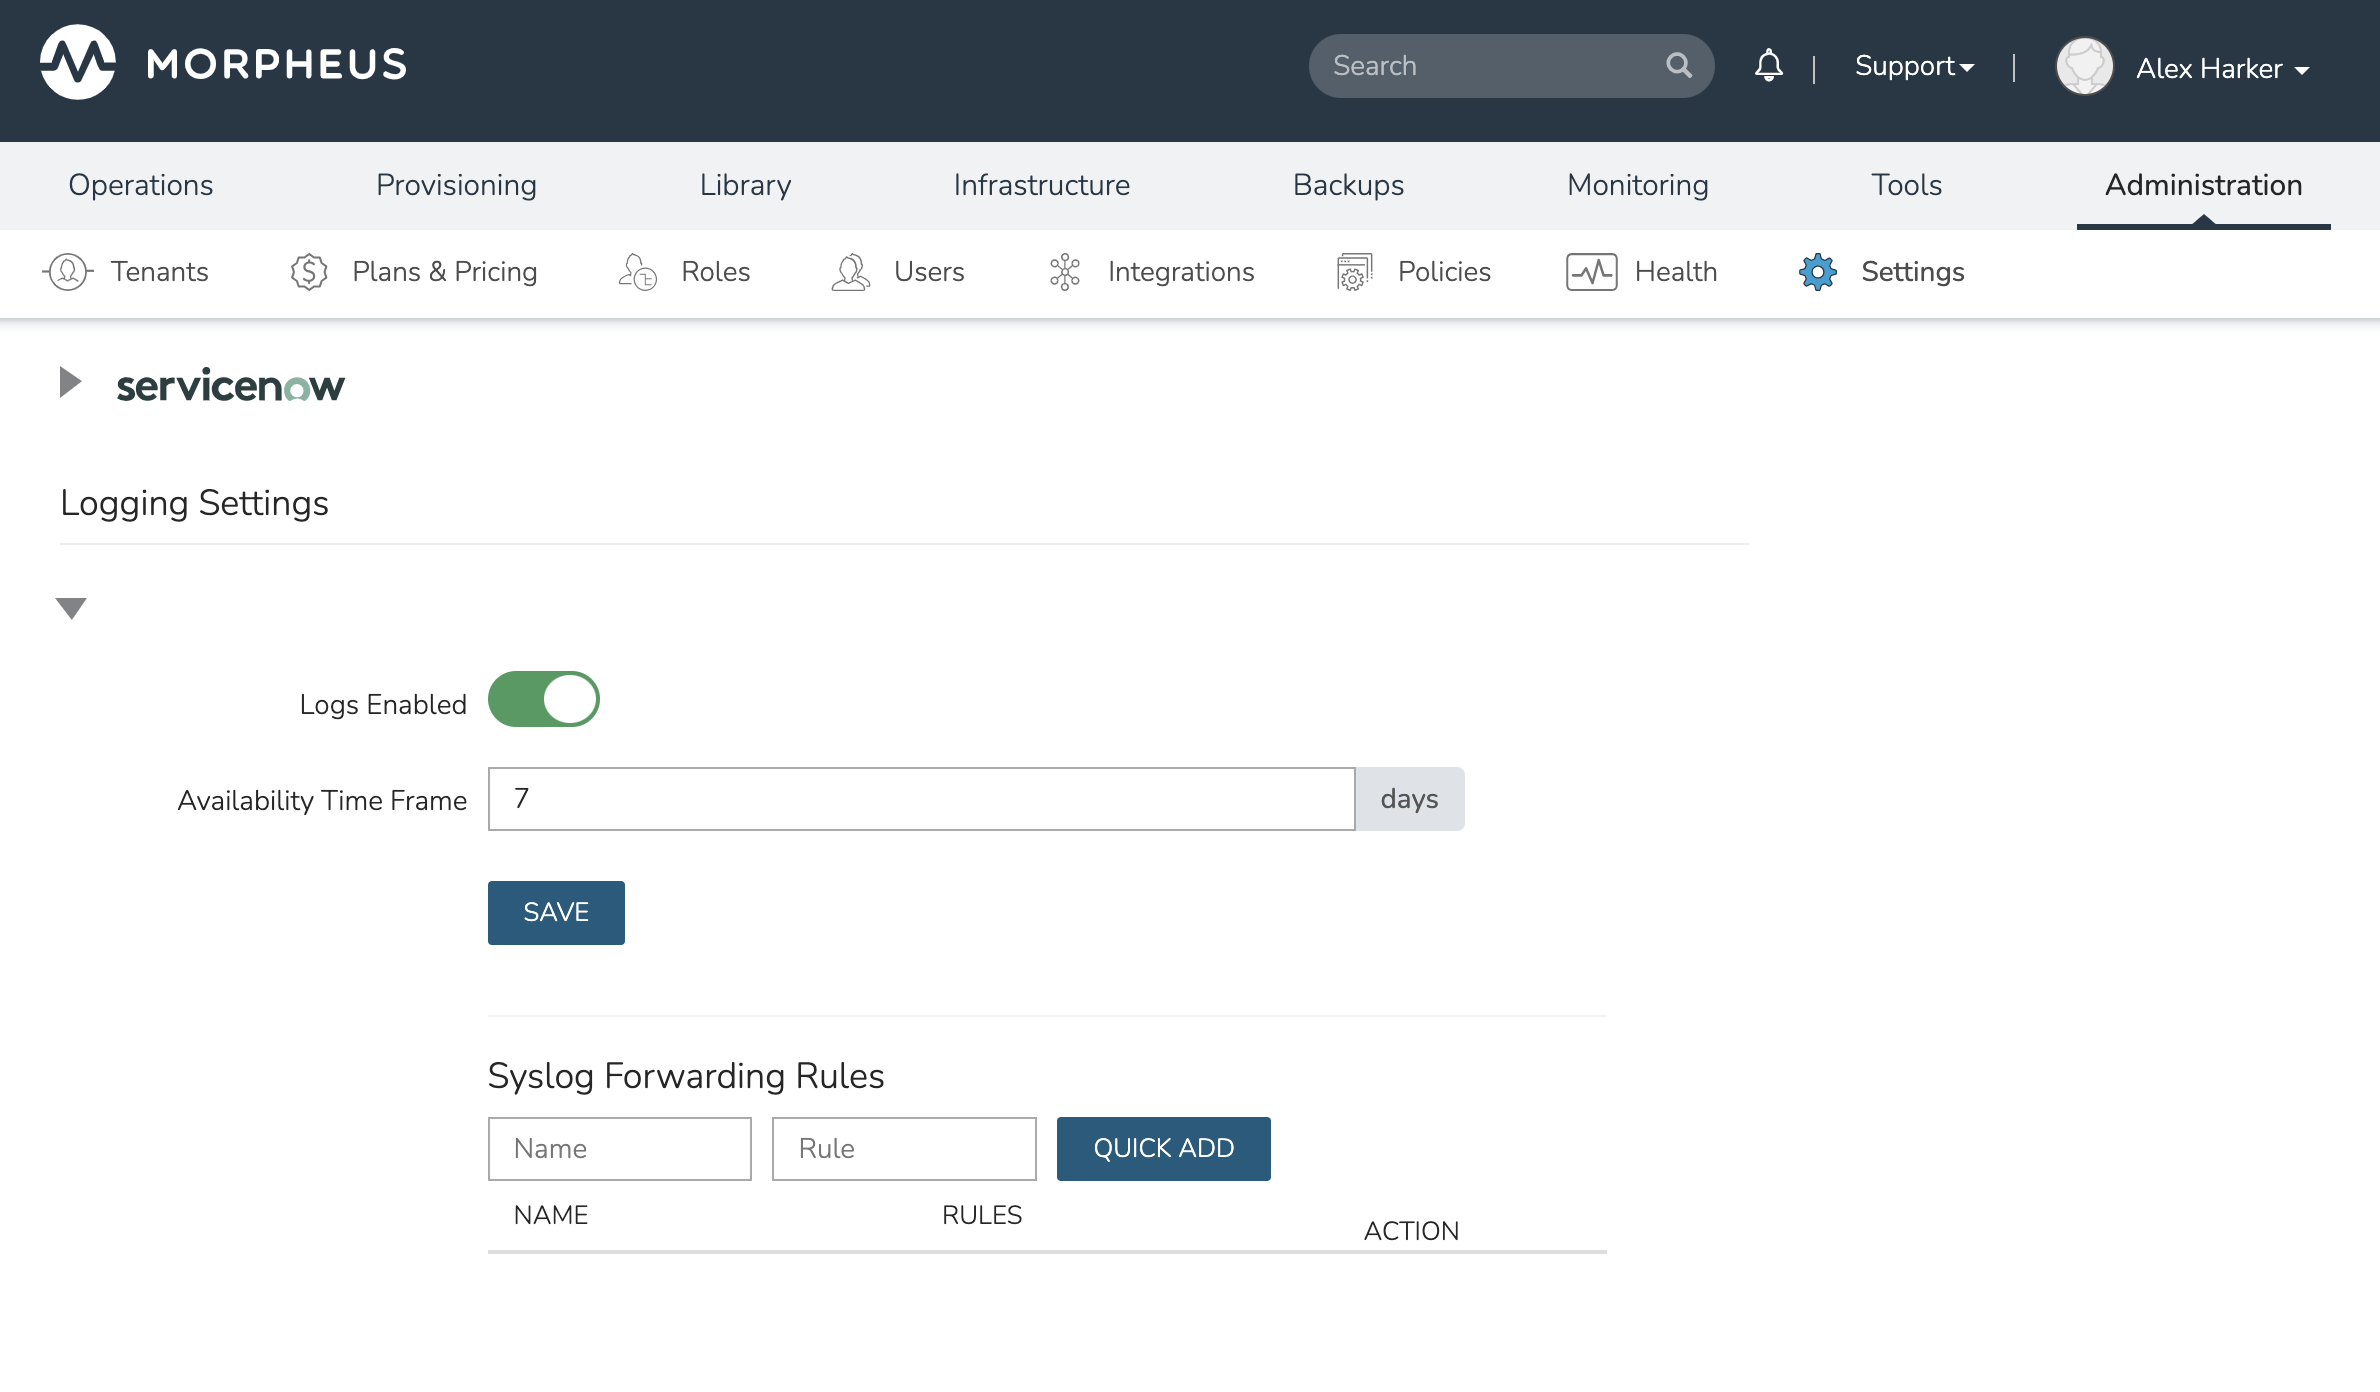
Logs are stored in ElasticSearch and retention can be set by adjusting the Availability Time Frame in the Administration > Settings > Monitoring section. Logging can also be disabled with a simple toggle switch just above the Availability Time Frame configuration.
Advanced Options
Expand Advanced Options beneath the standard logging settings to access Agent Log Throttle and Agent Log Deduplication controls.
Agent Log Throttle Policy
The Agent Log Throttle Policy protects the HPE Morpheus Software appliance from being overwhelmed when a single server agent sends logs at an excessive rate. When a server’s cumulative log volume exceeds a configurable ceiling, HPE Morpheus Software can raise an alarm, actively disable logging on the offending server, or both. All settings default to Off on new installations.
Setting |
Description |
Default |
Constraints |
|---|---|---|---|
Policy |
Controls the throttle response. Off performs no throttling. Monitor raises an alarm but continues storing logs. Enforce disables logging on the server and drops subsequent log batches. |
Off |
|
Threshold |
Maximum log volume allowed per minute before a breach is triggered (KB/min). |
2048 |
Minimum 100 |
Window |
Rolling time window used to measure cumulative log volume. The effective ceiling is |
30 minutes |
5–60 minutes |
Auto Re-enable |
When enabled, automatically re-enables logging on enforced servers and clears alarms after the cooldown period. When disabled, manual re-enablement is required. |
On |
|
Cooldown |
Time to wait after a breach before re-enabling logging or clearing alarms. Resets if the server re-breaches. |
60 minutes |
Must be ≥ Window |
How the ceiling is calculated: The effective byte ceiling for a window is threshold (KB/min) × window (minutes) × 1024. With defaults (2048 KB/min, 30-minute window), the ceiling is approximately 60 MB per 30-minute window.
Monitor mode: Log volume is tracked per server in a rolling window. When a server exceeds the ceiling, an alarm is raised on with category log.throttle.monitor. Logs continue to be stored. If auto re-enable is on, the alarm is cleared after the cooldown period elapses without a new breach.
Enforce mode: Same volume tracking as Monitor. When breached, logging is disabled on the server (enable_logs = false), subsequent log batches are dropped at the WebSocket layer, and the agent is commanded to stop transmitting. An alarm with category log.throttle.enforce is raised. If auto re-enable is on, a background job re-enables logging after the cooldown period. If auto re-enable is off, an administrator must manually re-enable logging on the server.
Per-server override: Individual servers can override the global policy via . The per-server policy takes precedence over the global setting. Threshold, window, and cooldown values always use the global configuration.
Alarms: Log throttle alarms appear on and can be acknowledged from that page or from the server detail page. Alarms include the server name, cloud, and breach details.
Agent Log Deduplication
When enabled, HPE Morpheus Software suppresses duplicate agent log messages per server within a rolling 30-second window. Only the first occurrence of each unique message is stored; repeats are discarded until the window resets. When the window resets, a summary entry records how many duplicates were suppressed.
This setting addresses scenarios where a single server floods identical syslog messages (for example, a repeated error condition) that can contribute to Elasticsearch pressure and queue exhaustion.
A per-server signature cap of 100 unique messages bounds memory usage during the deduplication window.
API
Log throttle and deduplication settings are available via the log settings API:
GET /api/log-settings— Returns current throttle and deduplication settings.PUT /api/log-settings— Update settings.
Fields: logThrottlePolicy, logThrottleThreshold, logThrottleWindow, logThrottleAutoReEnable, logThrottleCooldown, logDeduplication.
To query log throttle alarms across all tenants (master tenant only):
morpheus health alarms --query category="log.throttle" --query global=true
Backups
Backup Settings
The Backup settings page allows you enable or disable scheduled backups, select a default backup bucket, and administer global settings related to backups. Changes to global settings only affect new backups going forward and do not affect existing backups.
Note
Appliance backups are subject to a two-hour time limit to complete the backup. Automated backup attempts will be abandoned and will fail once this time limit is exceeded.
Important
Appliances with an HA architecture containing multiple app nodes must ensure all nodes can access stored backups. By default, if no “Default Backup Bucket” configuration is made, backups are stored in /var/opt/morpheus/bitcan. If this path is local to the app nodes, all other app nodes would not be able to reach the backups. In such a case, one solution would be to create an NFS share for the bitcan directory for all app nodes. Another solution would be to make a “Default Backup Bucket” configuration selection, which all nodes would then use for backup storage and retrieval.
HPE Morpheus Software Backup Settings
- Scheduled Backups
Enable automatic scheduled backups for provisioned instances
- Create Backups
When enabled, HPE Morpheus Software will automatically configure instances for manual or scheduled backups
- Backup Appliance
When enabled, a backup will be created for the HPE Morpheus Software appliance database. Select the
Backuptext link to view or edit settings related to the appliance backup- Default Backup Bucket
Select an existing bucket as the default for future backup runs. Click the
Infrastructure Storagetext link to add a new storage bucket to HPE Morpheus Software if needed- Default Backup Schedule
Choose a default schedule interval for automated backups. The available selections in this dropdown menu are Execution Schedules defined in Library > Automation > Execute Scheduling
- Default Backup Retention
Choose the default number of backups to be retained for automated Instance and appliance backup jobs
- Default Synthetic Full Backup enabled
When enabled, full synthetic backups will be on by default in addition to standard backups for supported workload types
- Default Synthetic Full Backup Schedule
Choose a default schedule interval for full synthetic backups. The available selections in this dropdown menu are Execution Schedules defined in Library > Automation > Execute Scheduling
Guidance
Overview
HPE Morpheus Software guidance is an important tool that makes recommendations for resource and cost optimization. It analyzes CPU, memory, and storage activities over time to make intelligent recommendations on sizing and power state. These recommendations can free up resources and save organizations significant amounts of money over time. Out of the box, HPE Morpheus Software is configured for sensible thresholds used in making these recommendations but they can be edited here if needed.
Note
These thresholds evaluate managed workload metrics over time to produce resize recommendations. They do not control the instantaneous appliance memory warnings shown under Administration > Health. See Health for those formulas and thresholds.
Power Settings
HPE Morpheus Software will recommend shutting down a resource if all three of the baselines in this section are exceeded:
Average CPU (%): Shutdown will be recommended if the average CPU usage is below this value. Values over 100% are possible as this value factors the number of CPU cores. Default value: 75
Maximum CPU (%): Shutdown will be recommended if the CPU usage never exceeds this value. Values over 100% are possible as this value factors the number of CPU cores. Default value: 500
Network Threshold (bytes): Shutdown will be recommended if the average network bandwidth is below this value. Default value: 2000 bytes/second
CPU Up-size Settings
CPU up-size will be recommended when both of the following baselines are exceeded for a resource:
Average CPU (%): CPU up-size is recommended if the average CPU percentage exceeds this value (and other criteria are also met). Default value: 50
Maximum CPU (%): CPU up-size is recommended if the maximum CPU percentage exceeds this value. Default value: 99
Memory Up-size Settings
Memory up-size will be recommended when both of the following thresholds are met for a resource:
Minimum Free Memory (%): Memory up-size will be recommended if free memory dips below this value. Default value: 10
Memory Down-size Settings
Memory down-size will be recommended when both of the following thresholds are met for a resource:
Average Free Memory (%): Memory down-size is recommended if the average free memory is above this value. Default value: 60
Maximum Free Memory (%): Memory down-size is recommended if free memory has never dipped below this value. Default value: 30
Clients
Overview
HPE Morpheus Software includes pre-configured OAuth clients and allows the user to create as many additional clients as they’d like. The pre-configured clients are editable but cannot be deleted. Once configured, access tokens may be generated or re-generated from the API Access section. Their expiration times may be viewed as well. Client settings are available only in the Primary Tenant and affect all Tenants.
Creating an OAuth Client
To create a new OAuth Client, click + ADD and configure the following:
CLIENT ID: A reference name for the client in HPE Morpheus Software
SECRET: An optional OAuth client secret
ACCESS TOKEN VALIDITY INTERVAL (SECONDS): The length of time (in seconds) during which the token should be enabled
REFRESH TOKEN VALIDITY INTERVAL (SECONDS): The length of time (in seconds) during which the refresh token should be enabled
Once the client is configured, click SAVE CHANGES.
Editing and Deleting OAuth Clients
From the OAuth client list view (Administration > Settings > Clients), click the pencil (✎) or trash can (🗑) icons to edit or delete the OAuth Client.
Note
Pre-configured HPE Morpheus Software-default clients may be edited but not deleted. User-created clients may be edited or deleted.
Environments
Overview
The Environments section is where you create and manage your environment labels, which are available in the Environment dropdown during Instance or App provisioning. An Instance’s environment label can be changed by editing the Instance.
An Environment is an InstanceContextType record containing a code, name, description, display order, Tenant, visibility, and active state. Selecting one stores its context on the Instance or App. This supports categorization, display, filtering, automation variables, and naming-policy expressions; it is not itself a placement rule, lifecycle action, or RBAC boundary. Use Groups/Clouds and Policies for placement or lifecycle behavior and Roles/resource permissions for access segmentation. Provisioning Settings can require users to select an Environment, but that requirement does not change what the selected value authorizes.
Creating Environments
Select + Create Environment
Populate the following for the New Environment:
- Name
The friendly name for the environment in HPE Morpheus Software
- Code
Shortcode used for API and CLI
- Description
Environment description displayed on the Environments list page
- Display Order
The order in which environments are presented when provisioning, a value of “0” will position the environment at the top of the list
- Visibility
Private: Available only in the Tenant the environment is created in
Public: Available for all Tenants. Public is only applicable for environments created in the the Master Tenant.
Note
User-created environments can be edited, hidden, or removed from the Actions menu on the environments list page. HPE Morpheus Software-default environments can only be hidden from users during provisioning.
Software Licenses
Overview
The License section is for automating the application of Licenses to Instances while provisioning. Licenses can be added to HPE Morpheus Software and then attached to images. HPE Morpheus Software will then apply the license to Instances provisioned using the images with license attached. Licenses can be configured for single or multiple Tenants.
Creating Licenses
Select + Create License
In the New License modal, enter the following:
- License Type
Windows
- Name
Name of the License in HPE Morpheus Software
- License Key
Enter the License Key
- Org Name
The Organization Name (if applicable) related to the license key
- Full Name
The Full Name (if applicable) related to the license key
- Version
The License Version
- Copies
The Number of copies available on the License
- Description
License description displayed in the Licenses list in HPE Morpheus Software, helpful for identifying the License after creation
- Virtual Images
- Search for existing Virtual Images by name and select to attach the image to the license.
Note
Virtual Images are synced from Clouds or added in the section.
- Tenant Permissions
Search for and select the Tenant(s) the License will be available for. Multiple Tenants can be added.
Save Changes
Provisioning with Licenses
When a Virtual Image is added to a license, HPE Morpheus Software will automatically apply the License to Instances configured with the Virtual Image during provisioning, including Instance Types with a Node Type that is configured with the Virtual Image, or if the image is selected when using generic Cloud Instances types (VMware, AWS, Nutanix, Openstack etc). Virtual Images can be removed from a License by editing the License.
Managing Licenses
Created Licenses details are displayed in the License page, including the number of copies applied per License, the Tenants added to the License, and the Virtual Images attached to the License.
The Name, Version, Copies, Description, Virtual Images and Tenant Permissions are editable but selecting the Actions dropdown on a License.
Note
License Types, Keys, Org Names and Full Names are not editable after a license has been created.
License can also be removed using the Actions dropdown on a License.
License
Overview
HPE Morpheus Software requires a valid license for provisioning new Instances, Apps and Hosts, and converting existing Instances and Hosts to managed. Licenses can be applied and updated in this section, and the current license status can be checked.
The limits shown on the License page depend on the applied license. Current standard licenses can include a socket limit. Older licenses can instead use workload element (WLE), managed RAM, storage, Host, or HVM-specific limits. The rules in Socket Consumption describe the current standard socket limit; they do not replace the terms of the applicable license agreement.
Note
The appliance License page controls the HPE Morpheus Software product license and capacity limits. It is different from the Software Licenses section, which stores third-party software license keys for application to provisioned Instances.
Current Licenses and Usage
If a License Key has already been applied, the License page shows the installed license, its effective dates, and each limit encoded in the license. When multiple compatible licenses are installed, the page also shows the effective stacked license.
- Tenant Name
Company name the License was generated for.
- Start Date
Date and time the current License started.
- End Date
Date and time the current License expires.
- Usage
Used and available capacity for the limits encoded in the License. For a standard socket license, expand the Sockets usage details to view Host Sockets, Private Cloud VM Sockets, and Public Cloud VM Sockets.
The License page is the source for the appliance’s calculated usage. Contact your account team if the displayed limits differ from your license agreement or if you need help interpreting contractual entitlements.
Note
Once a current License expires or reaches a hard limit, users can no longer provision resources governed by that limit or convert additional resources to managed. HPE Morpheus Software otherwise continues to function.
Socket Consumption
For a current standard socket license, total socket usage is the sum of:
Physical sockets on qualifying private Cloud Hosts
VM-derived sockets for public Cloud VMs
VM-derived sockets for private Cloud VMs only when their Cloud has no qualifying inventoried Host
The VM-derived rate is 15 VMs per socket. The appliance can calculate fractional usage when the VM count is not an exact multiple of 15; use the value shown on the License page rather than estimating how a fraction is displayed.
Resource |
Socket consumption |
Calculation |
|---|---|---|
Physical hypervisor, container hypervisor, or bare metal Host in a private Cloud |
Yes |
Uses the Host’s reported physical socket count. If no socket count is reported, the Host consumes two sockets. |
Duplicate inventory record for the same physical private Cloud Host |
No additional sockets |
Records that share the same unique Host identifier are counted once. |
Guest VM in a private Cloud with qualifying inventoried Hosts |
No additional sockets |
The underlying Hosts already consume their physical sockets, so their guest VMs are not counted again. |
VM in a private Cloud without qualifying inventoried Hosts |
Yes |
The appliance divides the number of VMs by 15 to calculate VM-derived sockets. |
VM in a public Cloud |
Yes |
The appliance divides the number of VMs by 15 to calculate VM-derived sockets. |
Virtual HKS control plane or worker node on VMware |
No additional sockets |
When the VMware Hosts are inventoried and counted, the HKS nodes are guest VMs and do not consume sockets again. |
Bare metal HKS worker Host |
Yes |
Uses the worker Host’s reported physical sockets, or two sockets when no value is reported. |
Controller, Kubernetes master, guest Host, or nested child Host record |
No physical Host sockets |
These records are excluded from the qualifying private Cloud Host count. Their underlying physical Hosts can still consume sockets. |
This accounting prevents double counting in a private Cloud. For example, virtual HKS nodes running on VMware do not consume an HKS socket allocation in addition to the physical sockets already consumed by the VMware Hosts.
Socket Consumption Examples
- Virtual HKS on VMware
A VMware Cloud contains three inventoried Hosts with two physical sockets each. The Hosts consume six sockets total. An HKS cluster runs three control plane VMs and six worker VMs on those Hosts. The nine HKS guest VMs consume zero additional sockets, so total socket usage remains six.
- Bare Metal HKS
An HKS cluster contains four qualifying bare metal worker Hosts with two physical sockets each. The workers consume eight sockets total. Kubernetes master records are excluded from the physical Host count. If a qualifying worker does not report its socket count, HPE Morpheus Software counts two sockets for that worker.
- Public Cloud VMs
Thirty VMs in a public Cloud consume two VM-derived sockets:
30 / 15 = 2.- Private Cloud VMs without inventoried Hosts
Thirty VMs in a private Cloud with no qualifying inventoried hypervisor or bare metal Hosts consume two VM-derived sockets:
30 / 15 = 2. If qualifying Hosts are later inventoried for that Cloud, their physical sockets are counted and their guest VMs are no longer counted separately.
Legacy License Limits
Older licenses can use a different limit model. Depending on the applied License, the License page can show workload elements, managed RAM, storage, Hosts, or a separate HVM socket limit instead of the current standard socket limit. Do not combine limits from different models when estimating usage. The values and usage shown on the License page identify the model active on the appliance.
For information about WLE-based licensing, see the Workload Element Knowledge Base article.
Upgrade License Key
To add a new or update an existing License:
Copy the License Key into the License Key field
Click UPDATE
If valid, the new License will be applied.
Request new License
Licenses can be requested at https://app.morpheushub.com or by contacting your account team.
Utilities
System administrators have access to a utilities panel with the following options:
Reindex all searchable data: Execute
Toggle Maintenance Mode: Enable
Note
Maintenance mode cleanly places HPE Morpheus Software into a state where maintenance can be performed on the appliance. This drains any active sessions and queues so an auto-scaling group can scale down. It also drains active sessions across services. Restarting HPE Morpheus Software UI disables maintenance mode.
Note
When using HPE Morpheus Software in a Highly Available (HA) environment, it is important to navigate to a node directly and enable maintenance mode, as opposed to using the load balancer virtual IP (VIP). A local host entry to the specific node may be required to ensure the correct node enters mainteance mode. In fact, it is recommended to use the analogous API endpoint to toggle a specific node into maintenance mode to avoid redirects back to the VIP address.
A HPE Morpheus Software node in maintenance mode can still be accessible through the load balancer VIP/target group and can queue requests but will not process anything in queue, while in maintenance mode. A node can be removed/paused from the load balancer VIP or have VIP health checks implemented, if the node UI/API will become inaccessible due to maintenance.